Tag an Asset (Mobile)
The asset tagging wizard walks you through tagging an asset. To learn more about asset tagging, see What is Asset Tagging?
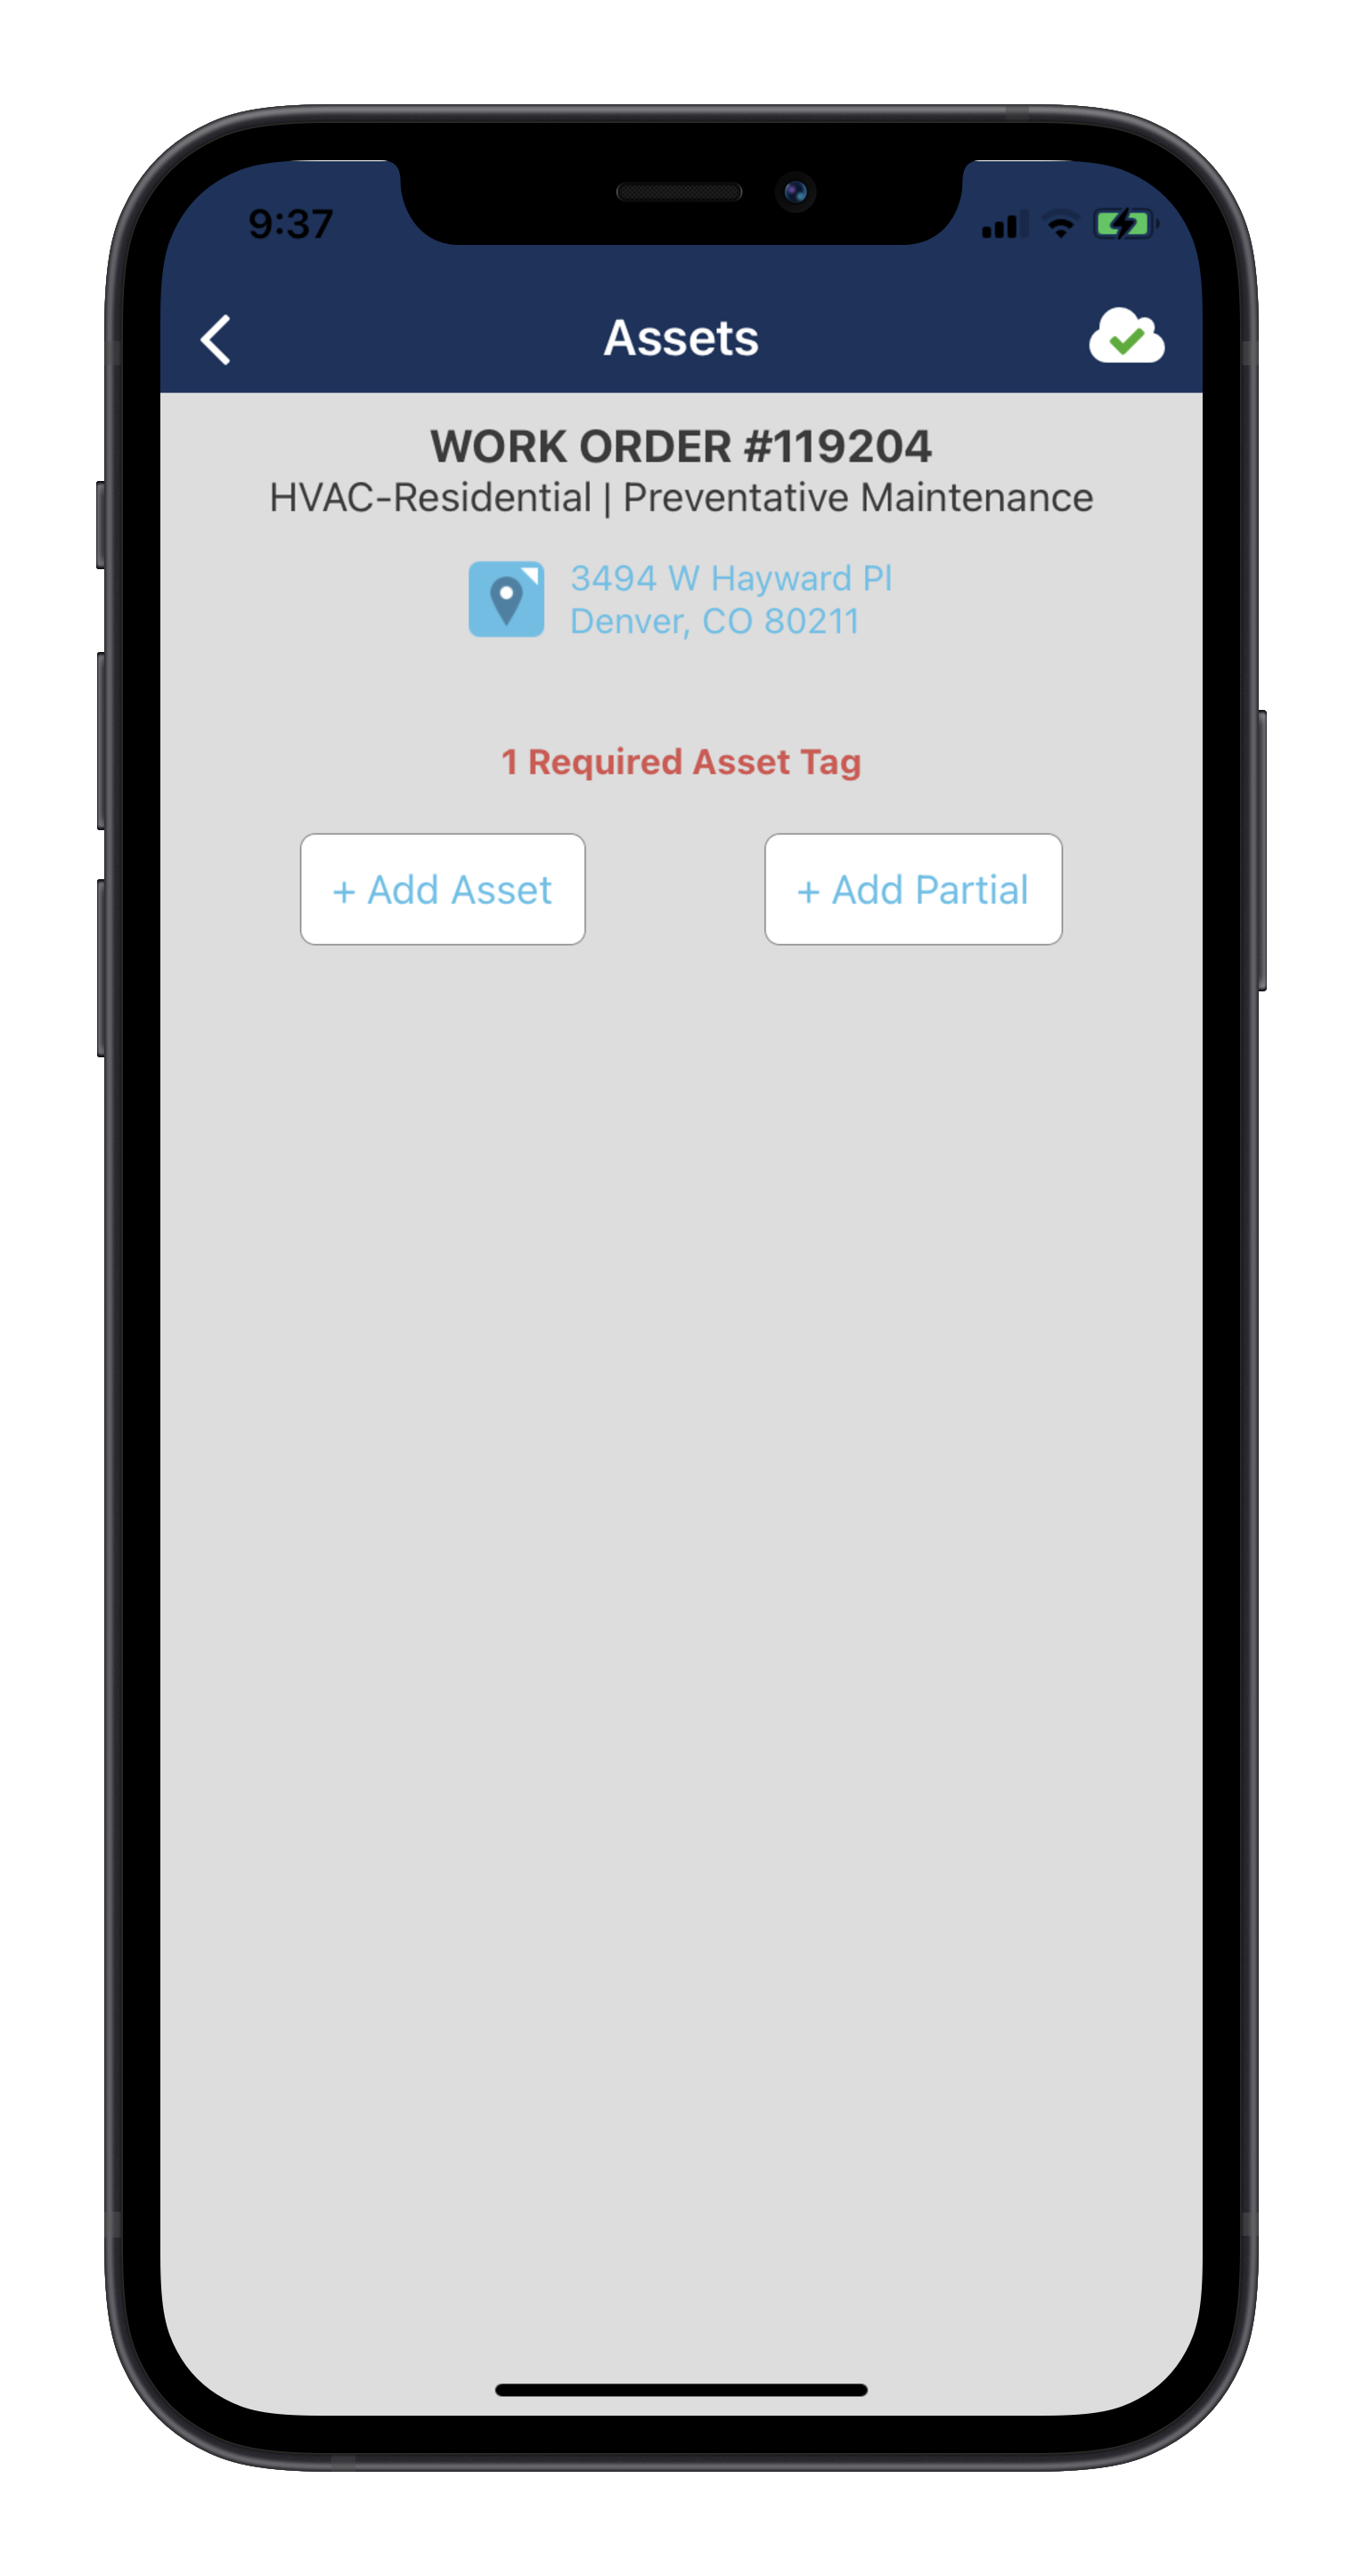
- Locate the work order and tap it to display it. Walk Through and Preventative Maintenance work orders are used for asset tagging.
- Tap Check In. You must be checked in to perform asset tagging.

After you check in, the Assets button appears. Tip: If you cannot access the home, tap Unable to Access. See Check In (Mobile).
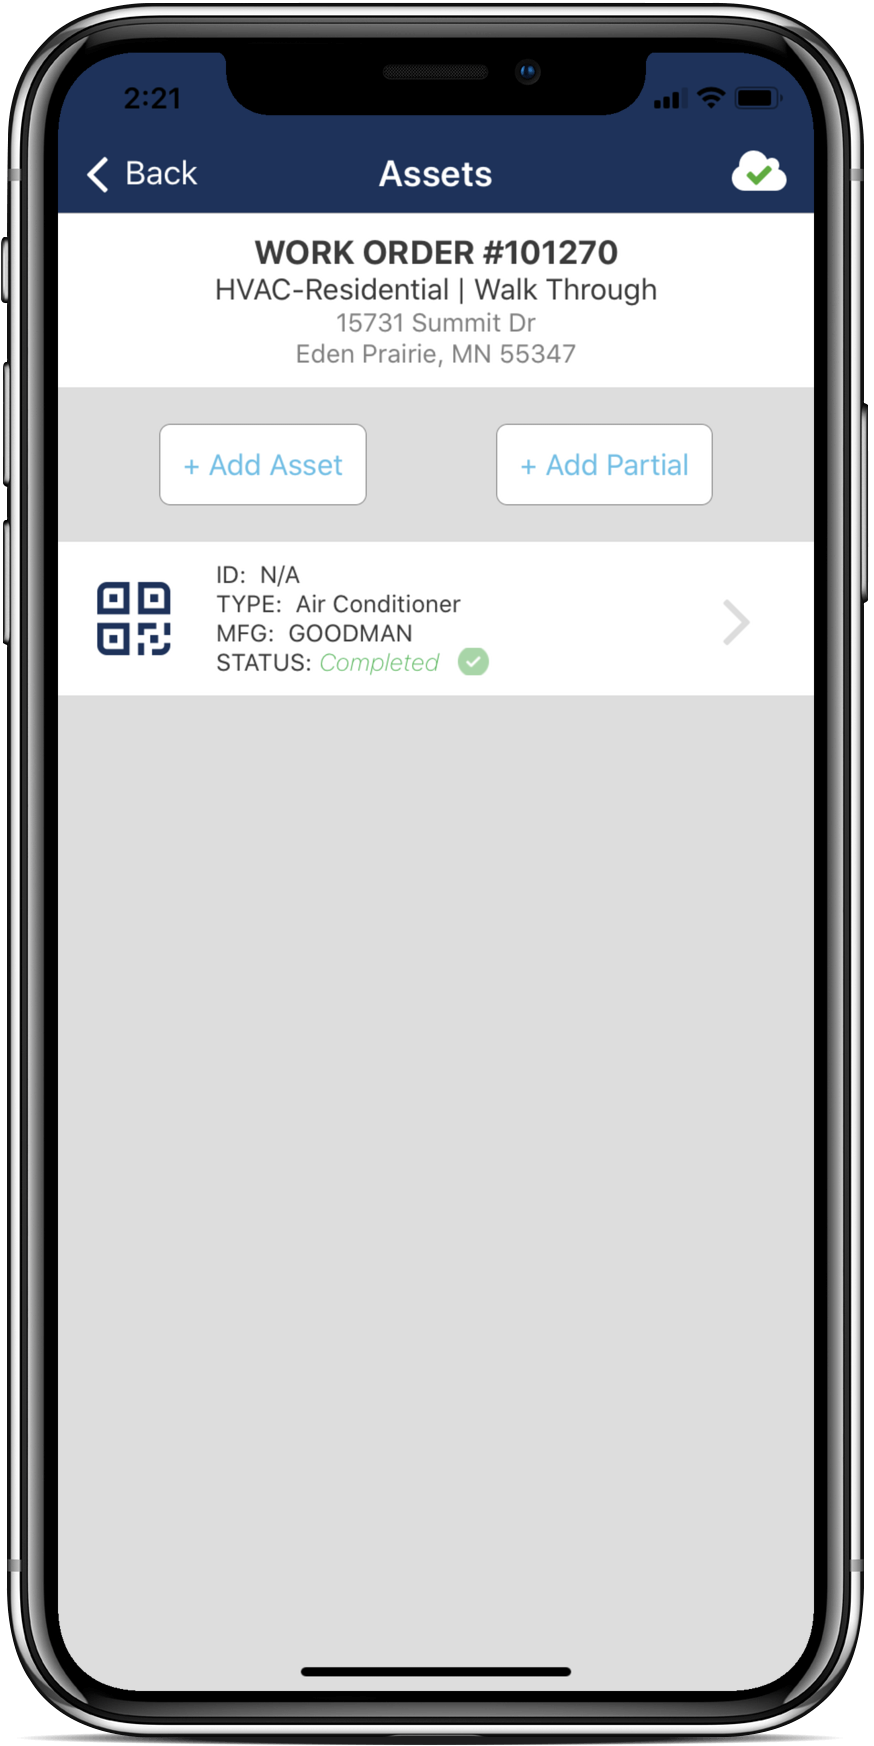
 - Tap the Assets button and tap Add Asset to start the Asset Tagging wizard. If assets have already been tagged for this property, they are visible here.

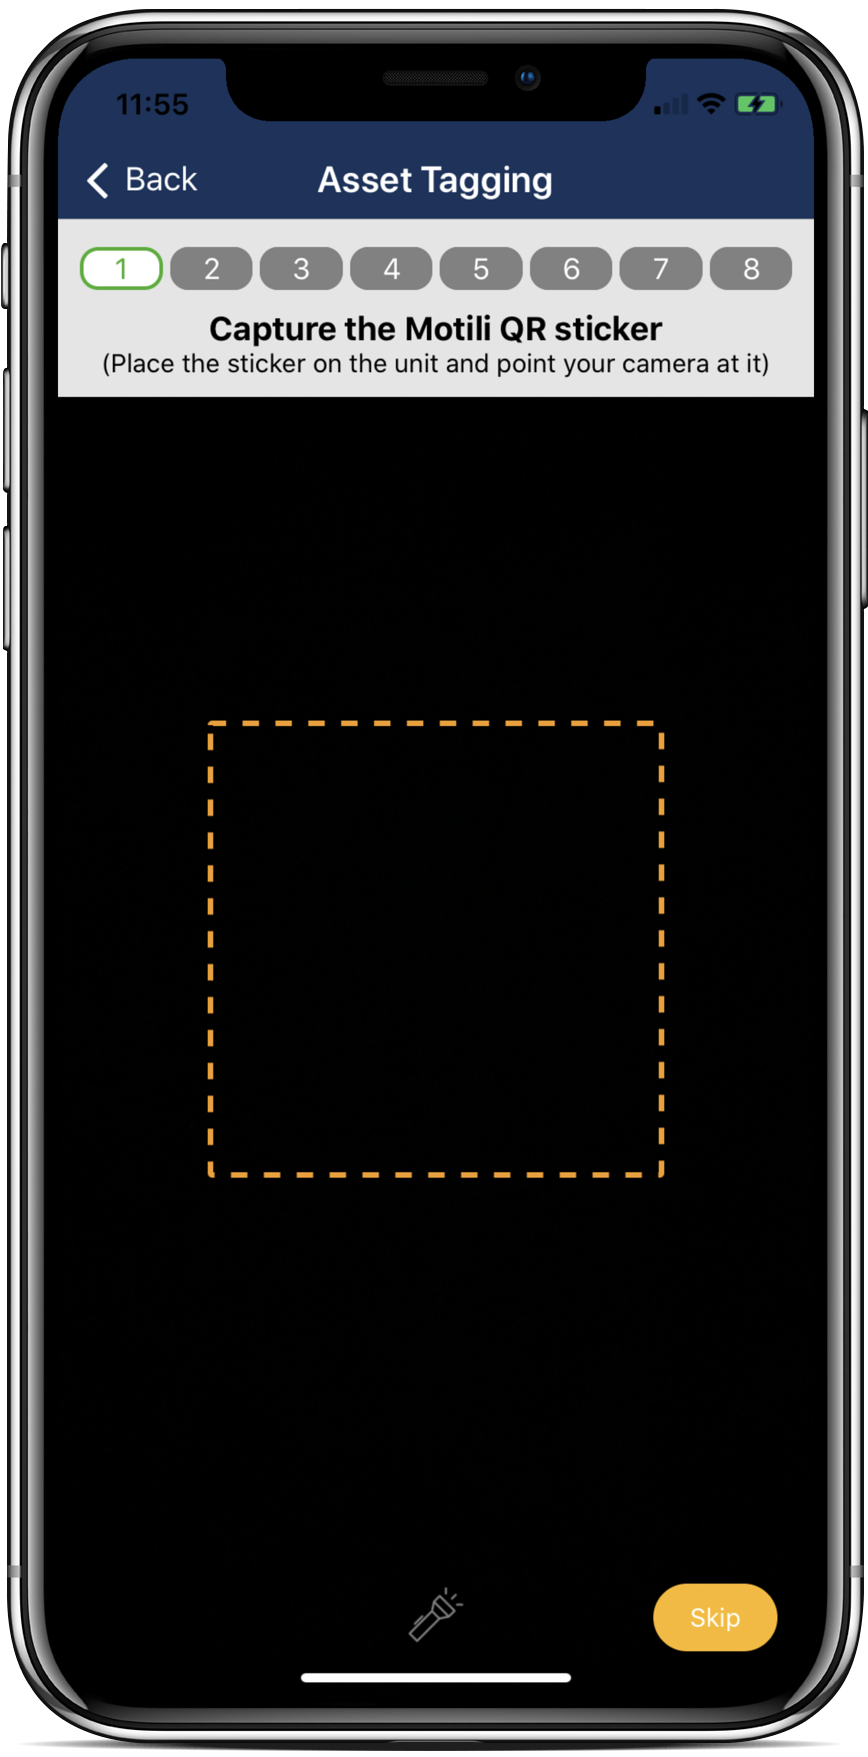
If you cannot tag the asset, tap Add Partial and choose a reason. - Hold your phone up to the QR code to automatically take a photo. If prompted, tap OK to let Motili access your camera.

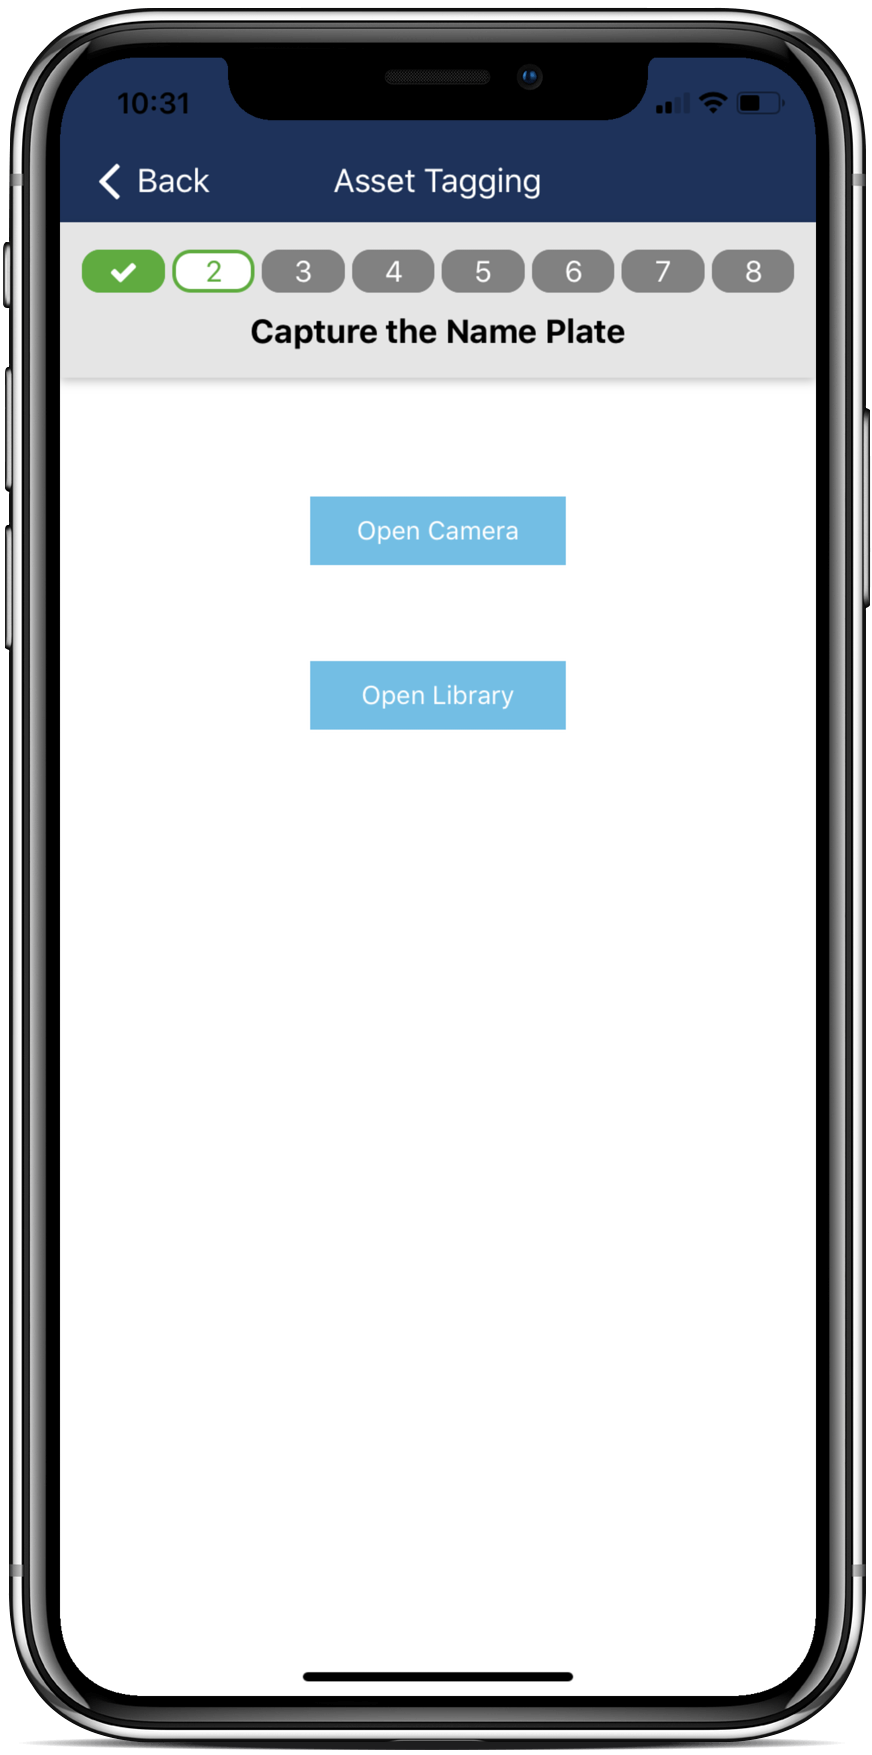
After you click Next, a check mark appears on Step 1 of the wizard and you automatically move on to Step 2. If the equipment does not have a QR code, tap Skip. - For Step 2 in the Asset Tagging Wizard, tap Open Camera or Open Library. You can take by a photo or choose an existing photo from your camera library. Each photo you add to a work order must be unique. Depending on client restrictions, if you reuse a photo from another work order, the photo can be rejected. You should remove duplicate photos from the work order.

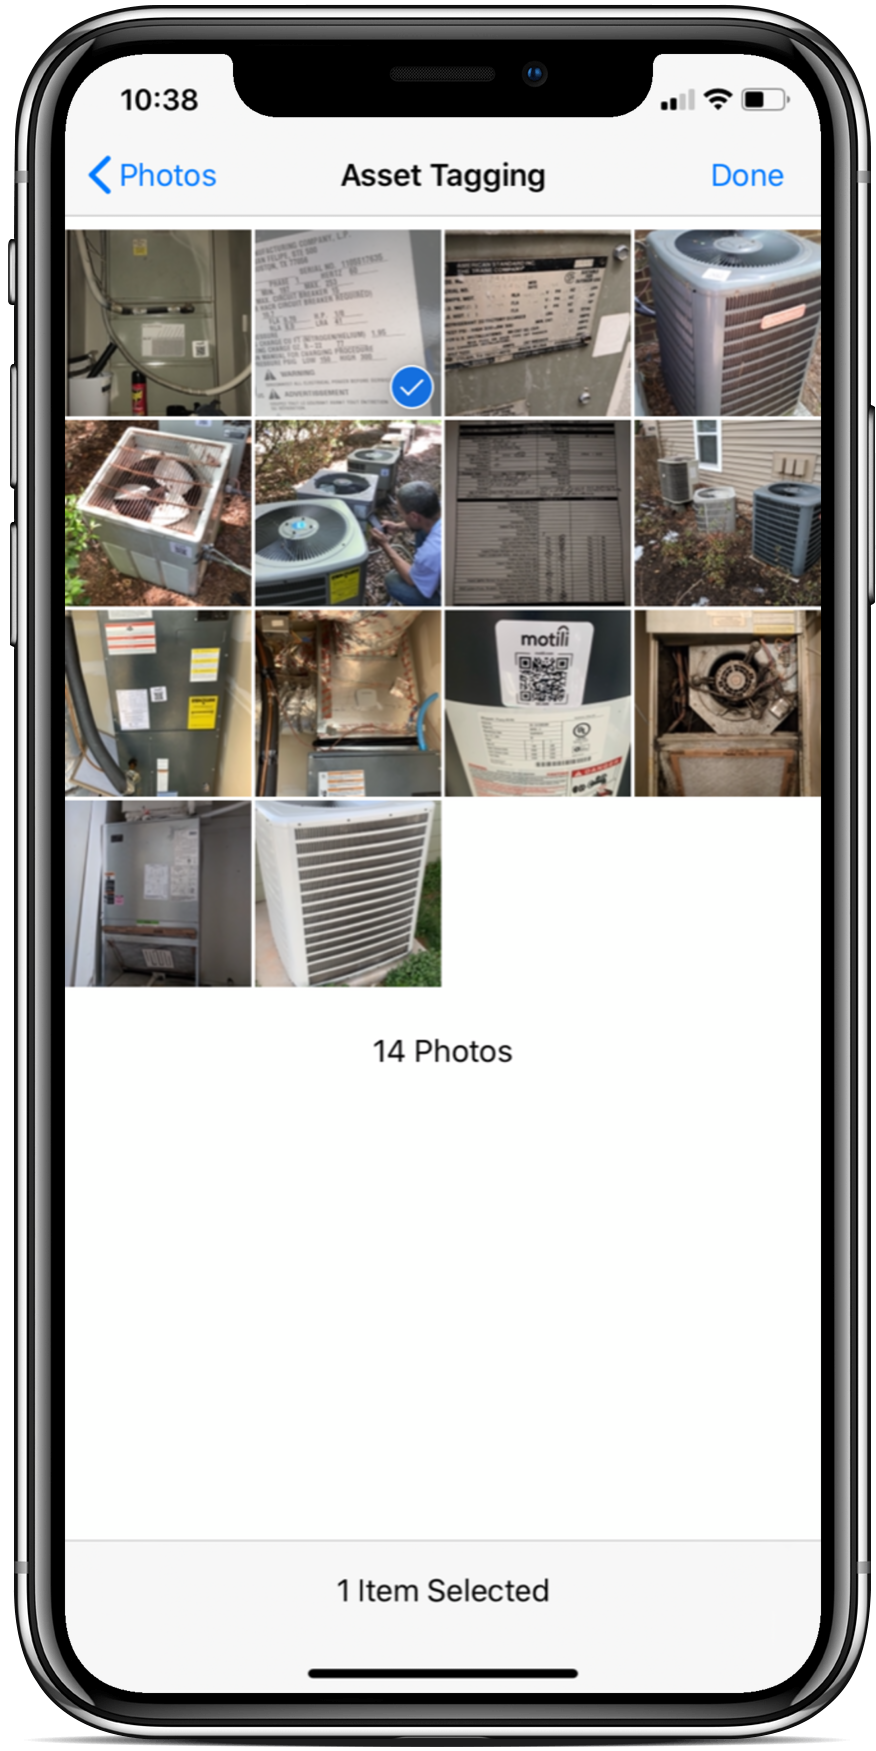
- If you tapped Open Library, tap the album, tap the photo, and tap Done. If you tapped Open Camera, take the photo and tap Use Photo. When you take a photo while using the Mobile App, the photo is stored in a new album called Motili.

Step 2 in the wizard now has a check mark. If you are not satisfied with that photo, tap the photo, tap Delete Photo, and then tap OK. - For Step 3, tap the type of equipment, choose the asset’s attributes and tap Confirm.

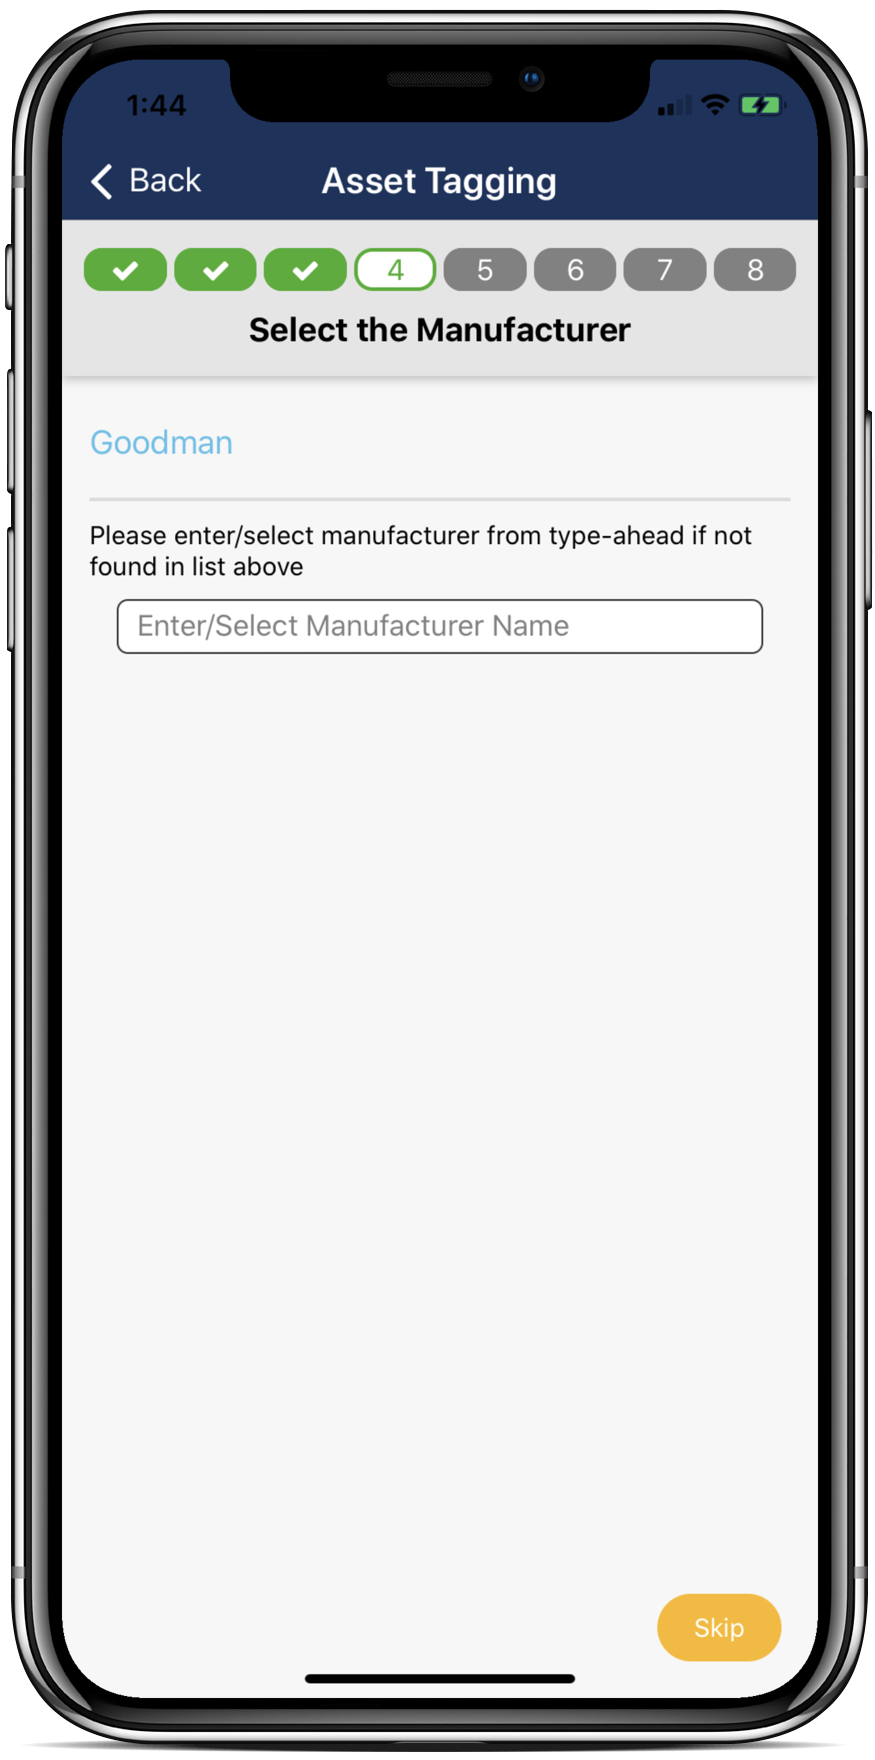
- For Step 4, If the manufacturer appears from the name plate photo you added, tap Skip. If it does not appear, tap the field, start to type the name, and tap it when it appears. If the manufacturer is not listed, tap Other, type the name in the field below, and tap Confirm.

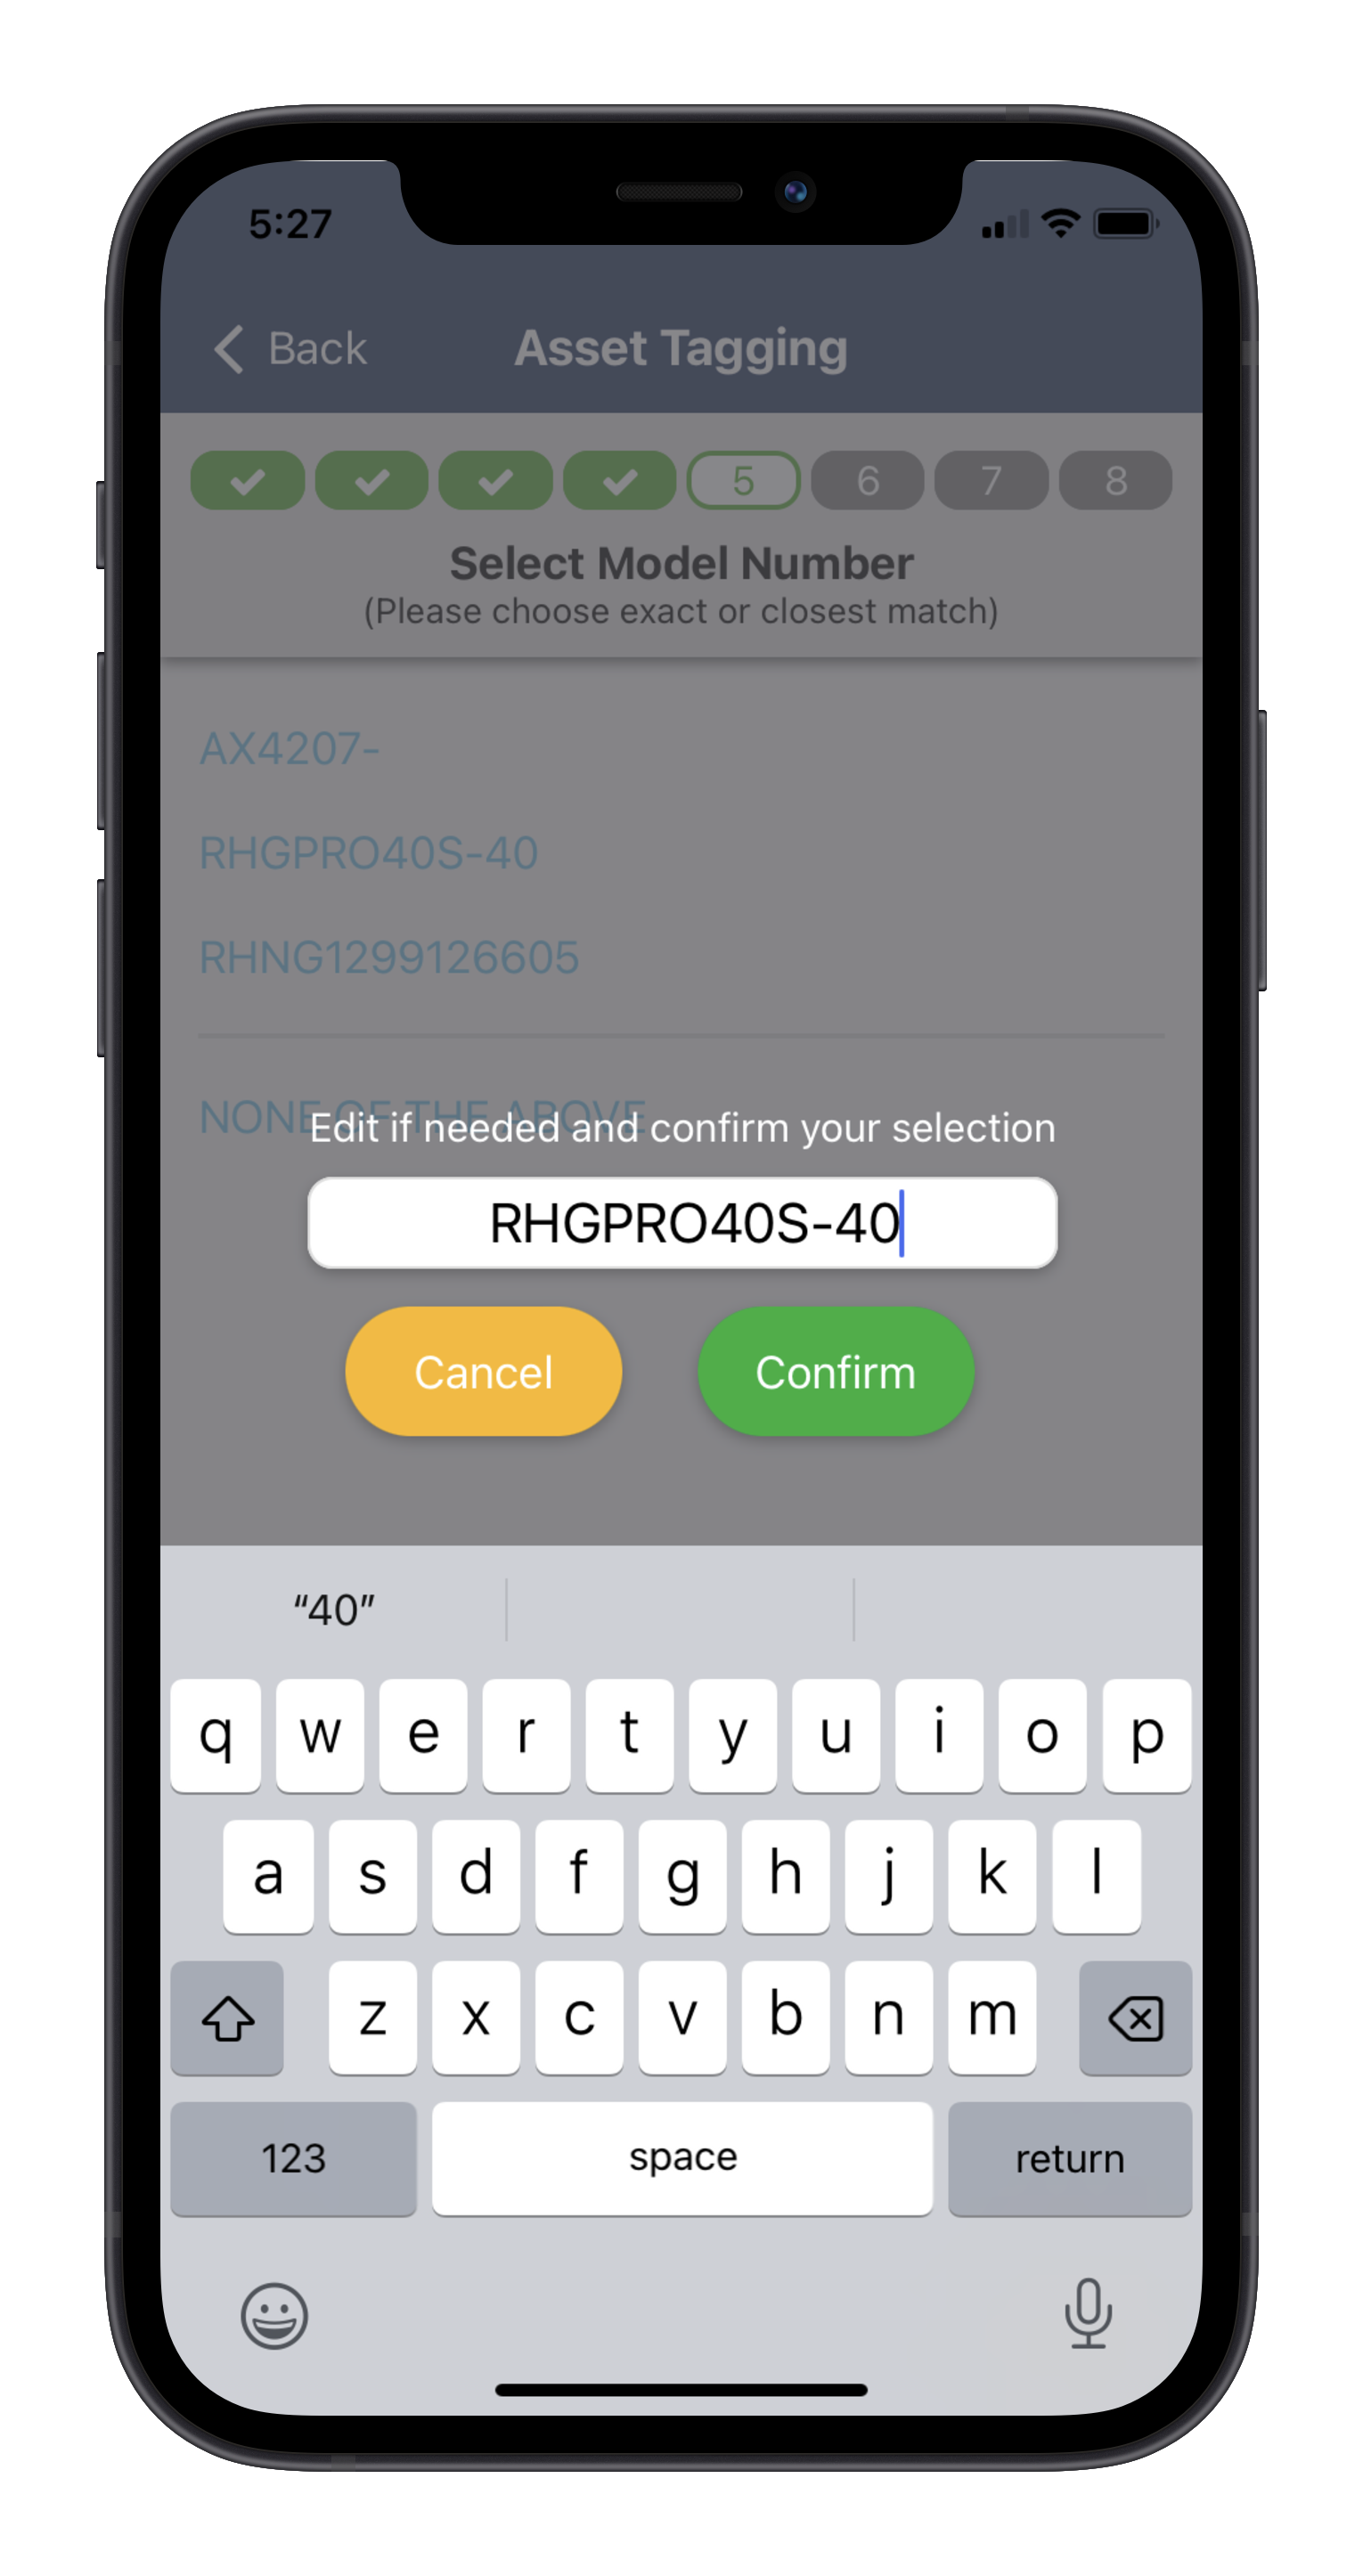
- For Step 5, if the Model Number appears and is correct, tap it and tap Confirm. If you need to edit the Model Number, do so before you tap Confirm.

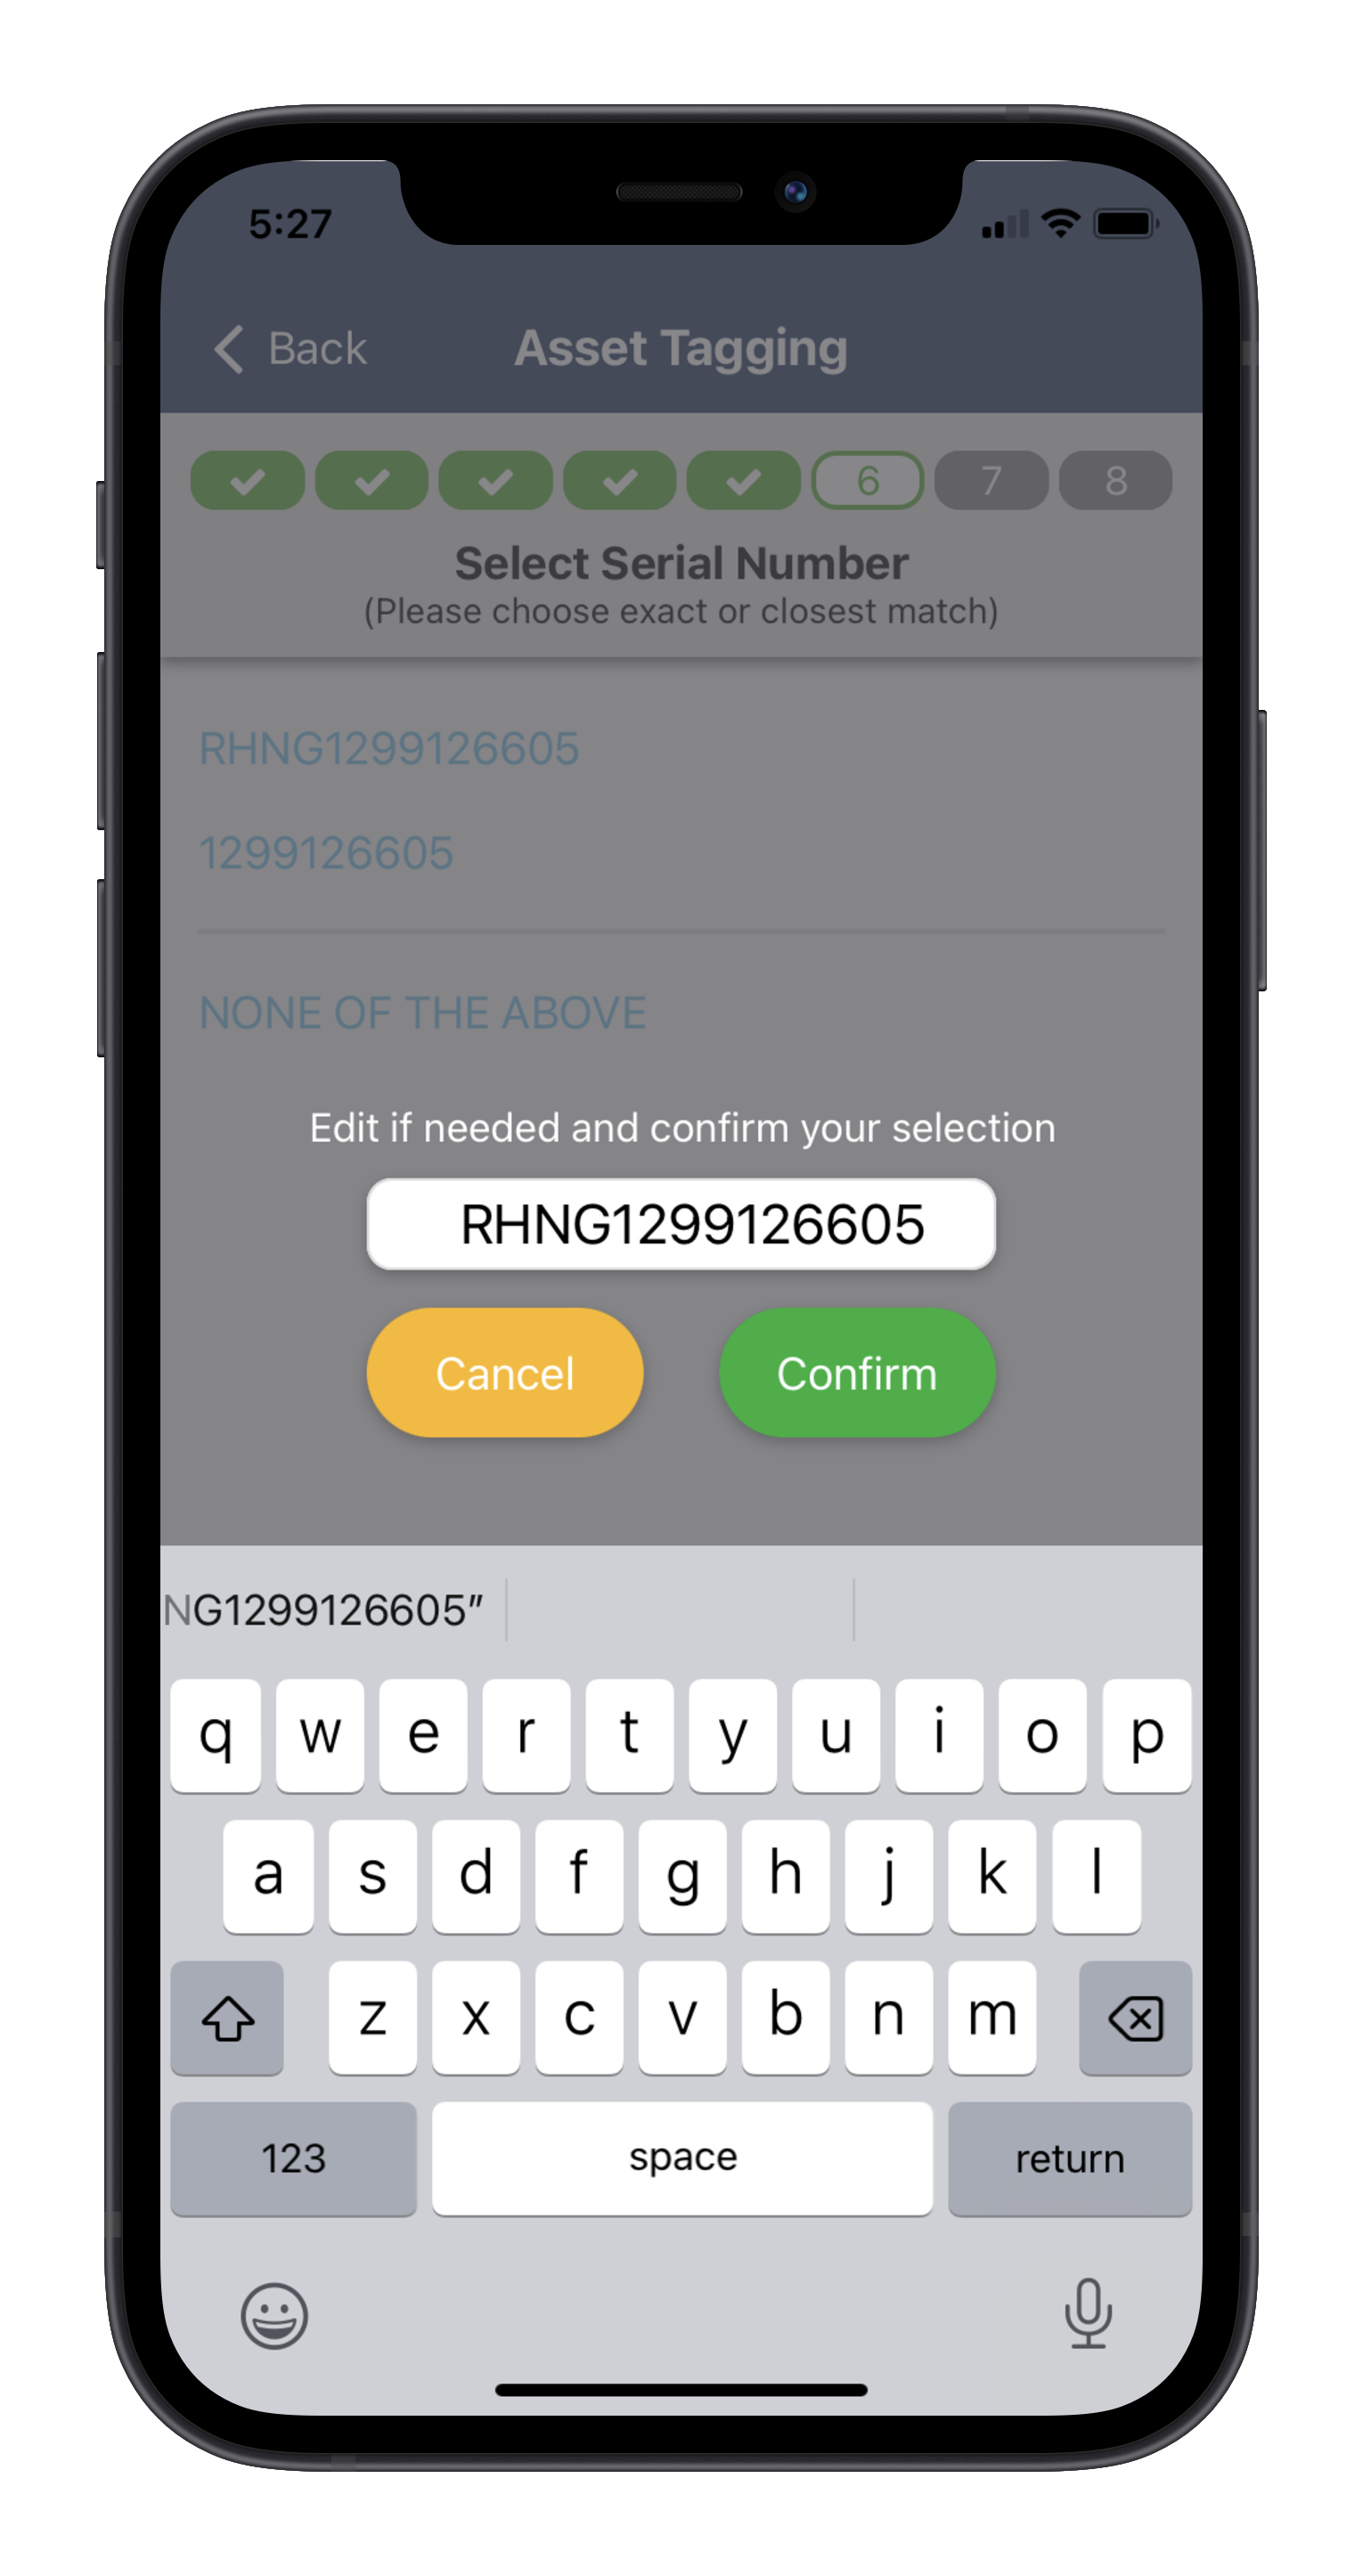
- For Step 6, if the Serial Number appears and is correct, tap Confirm. If you need to edit the Serial Number, do that before you tap Confirm.

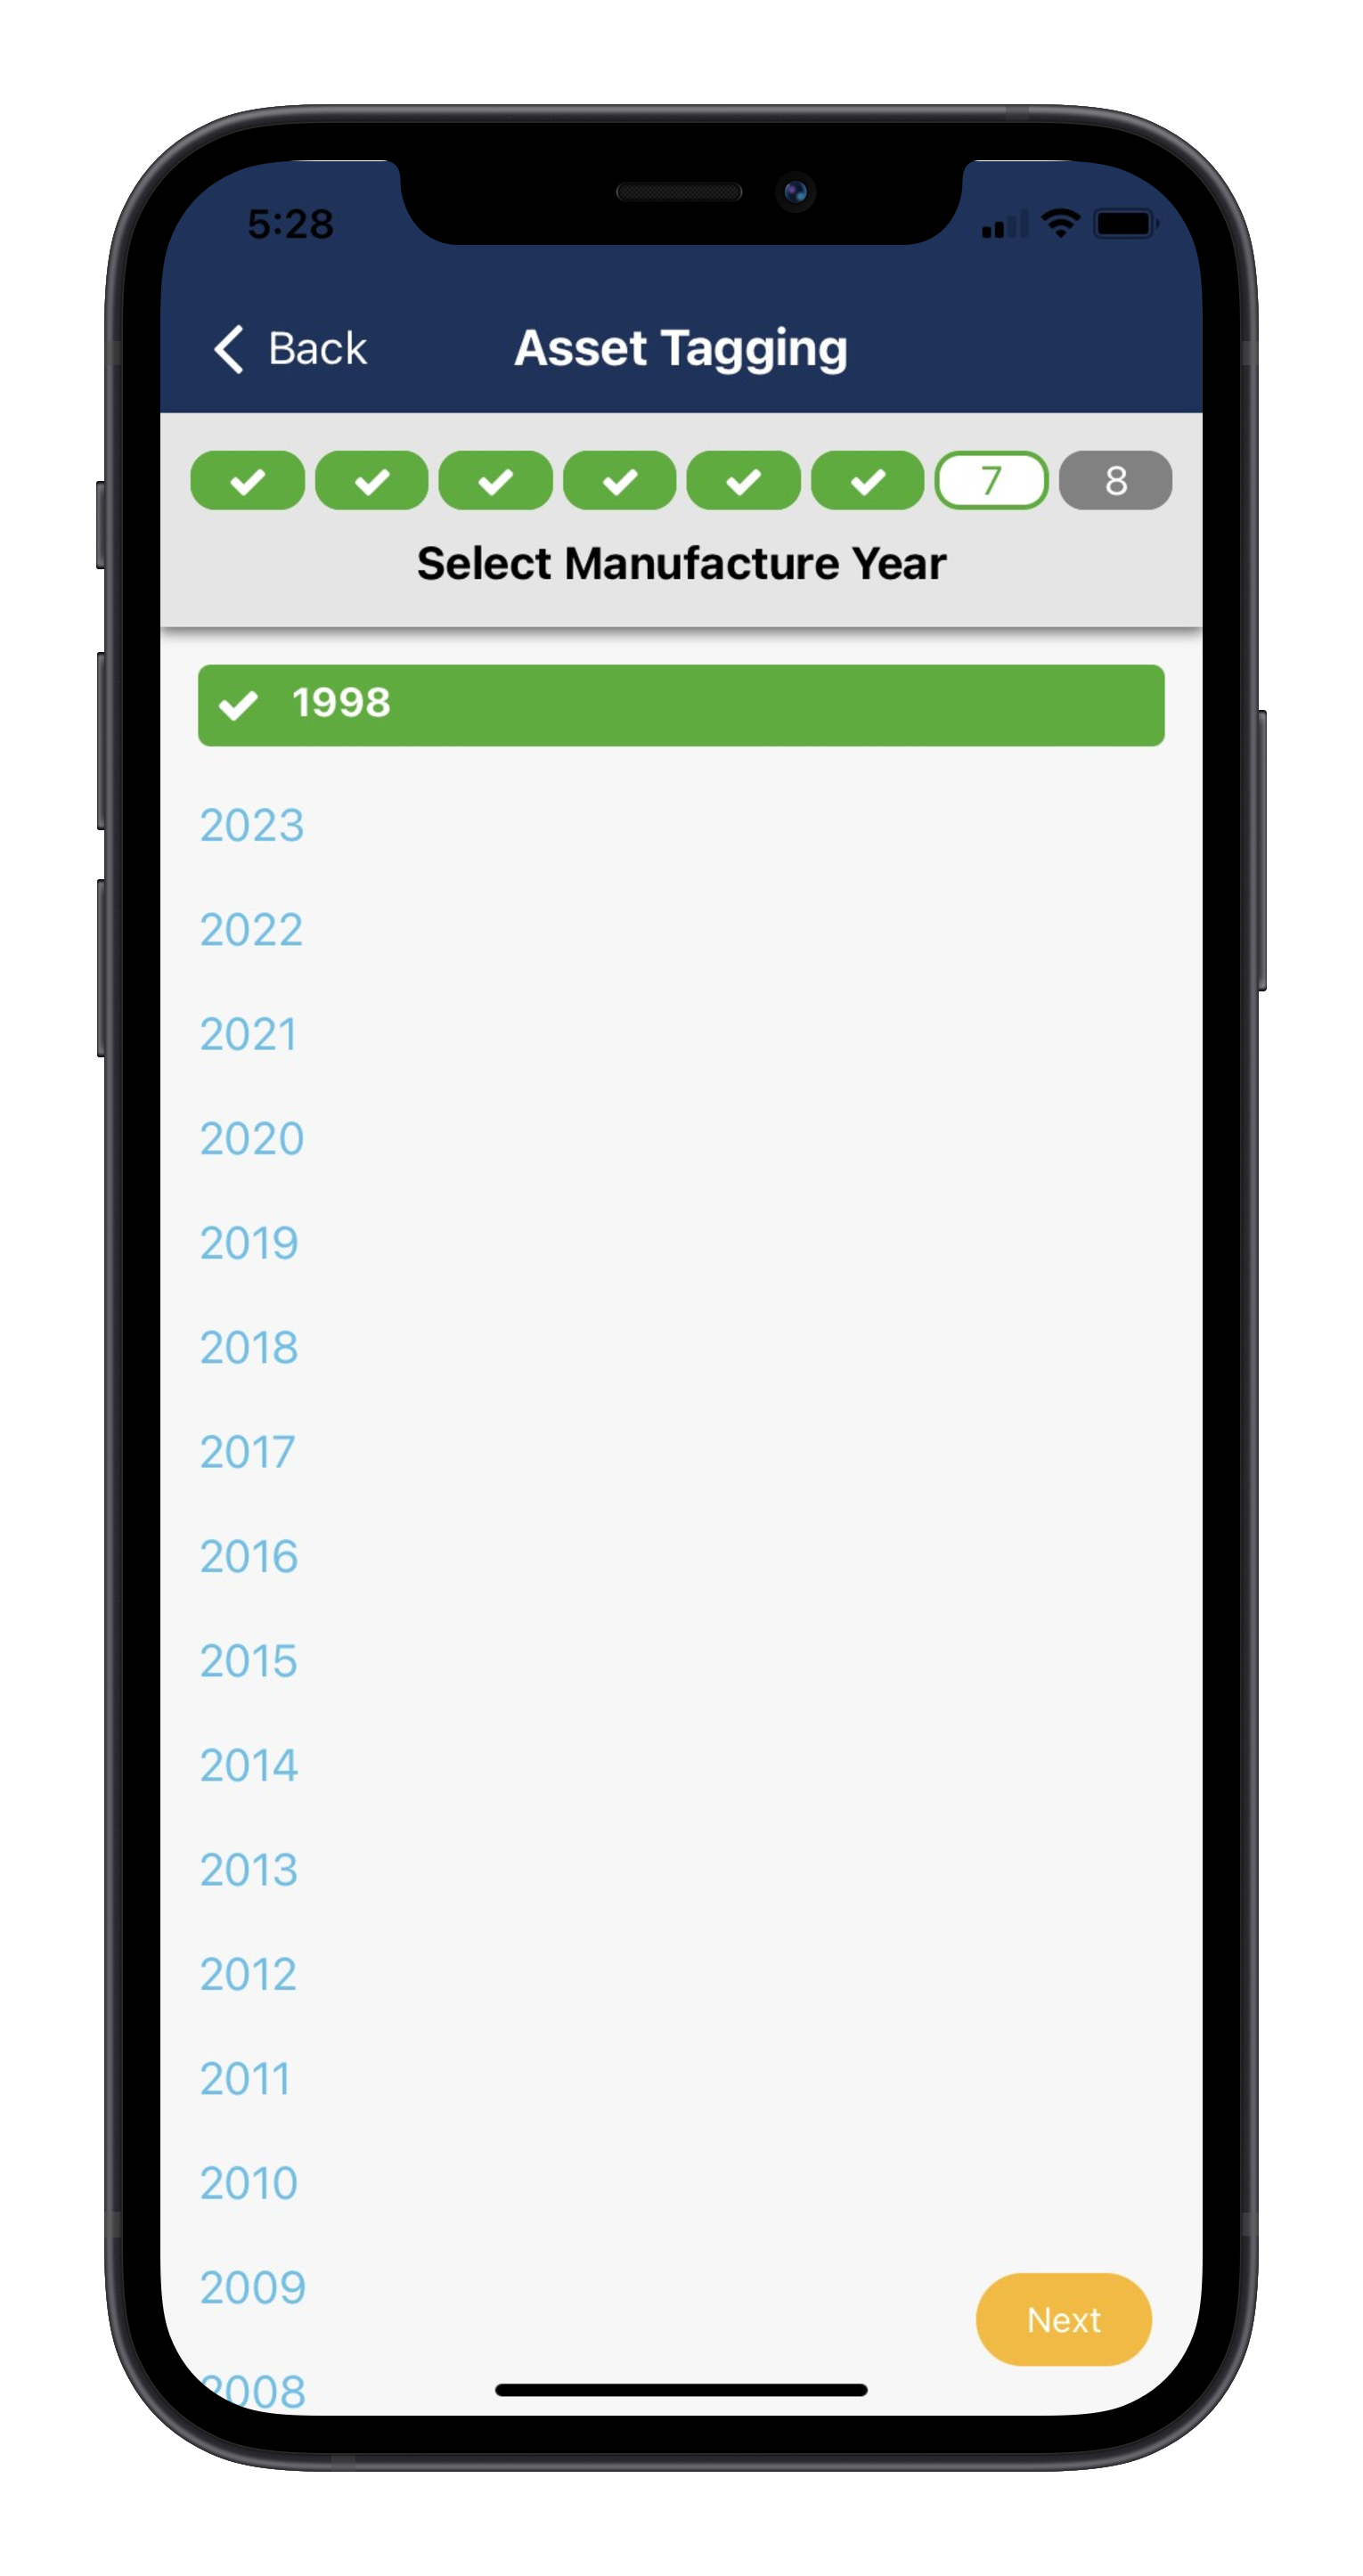
- For Step 7, tap the year the equipment was manufactured, and tap Confirm.

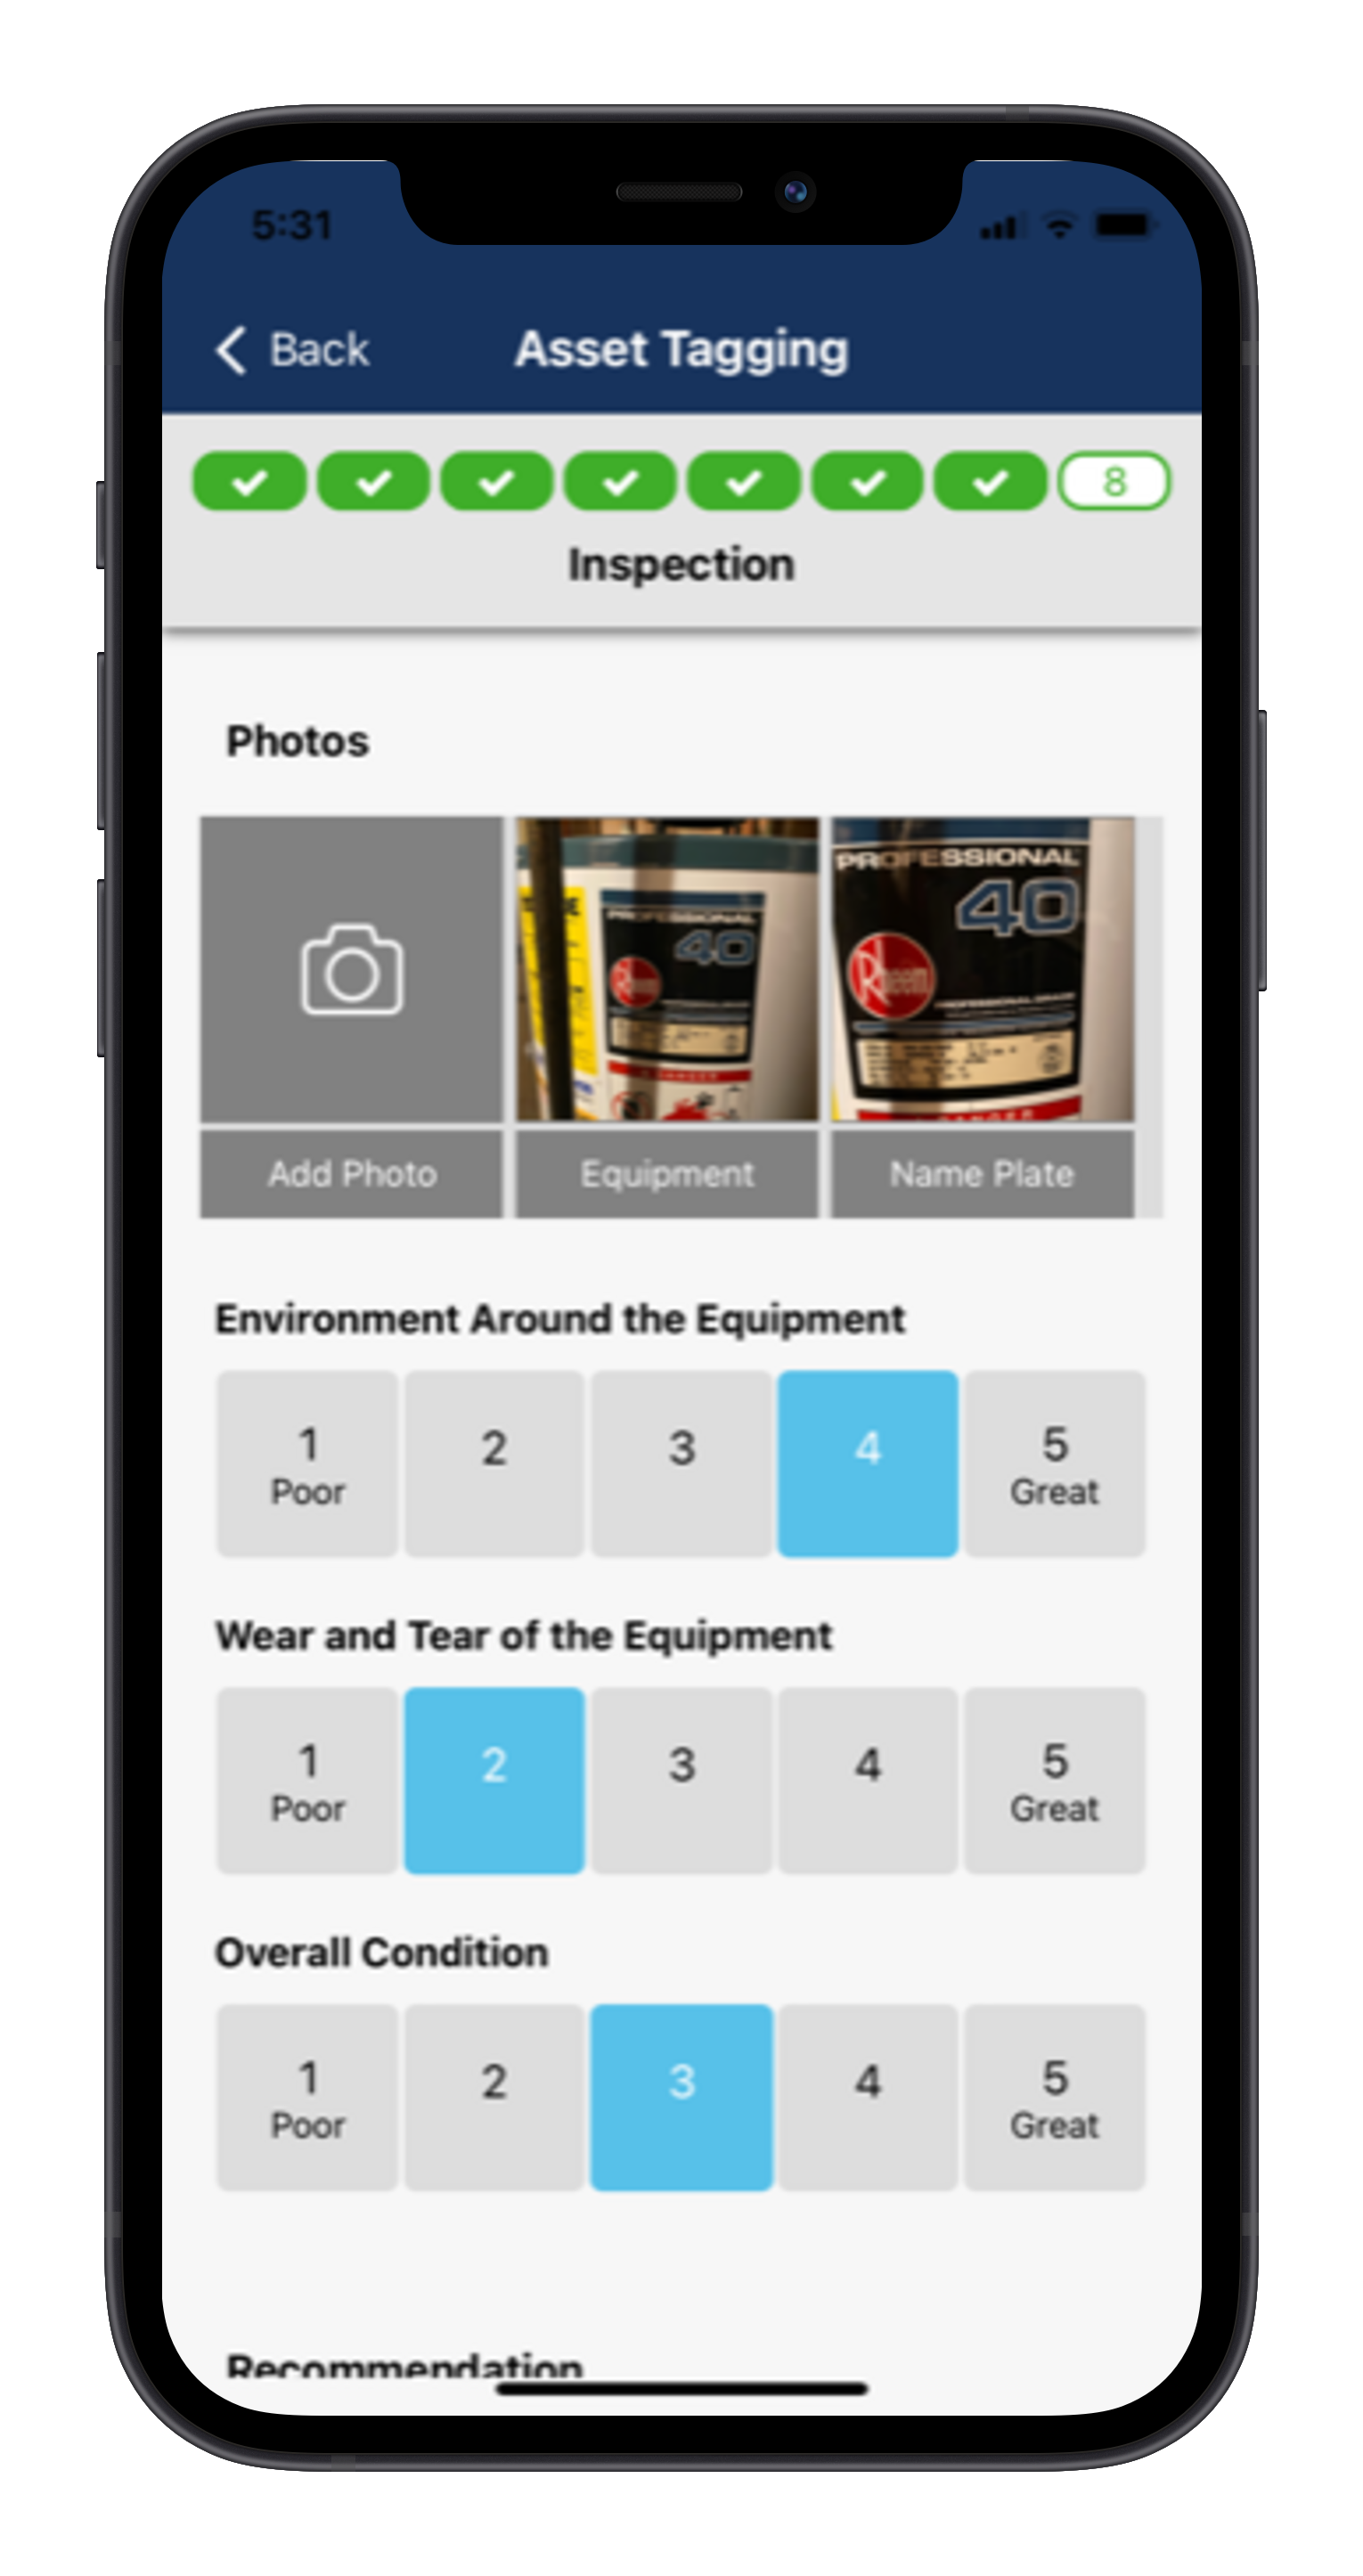
- For Step 8, tap Add Photo and upload any relevant photos. Two photos are required for an asset tagging job. For more information, see Add Photos.
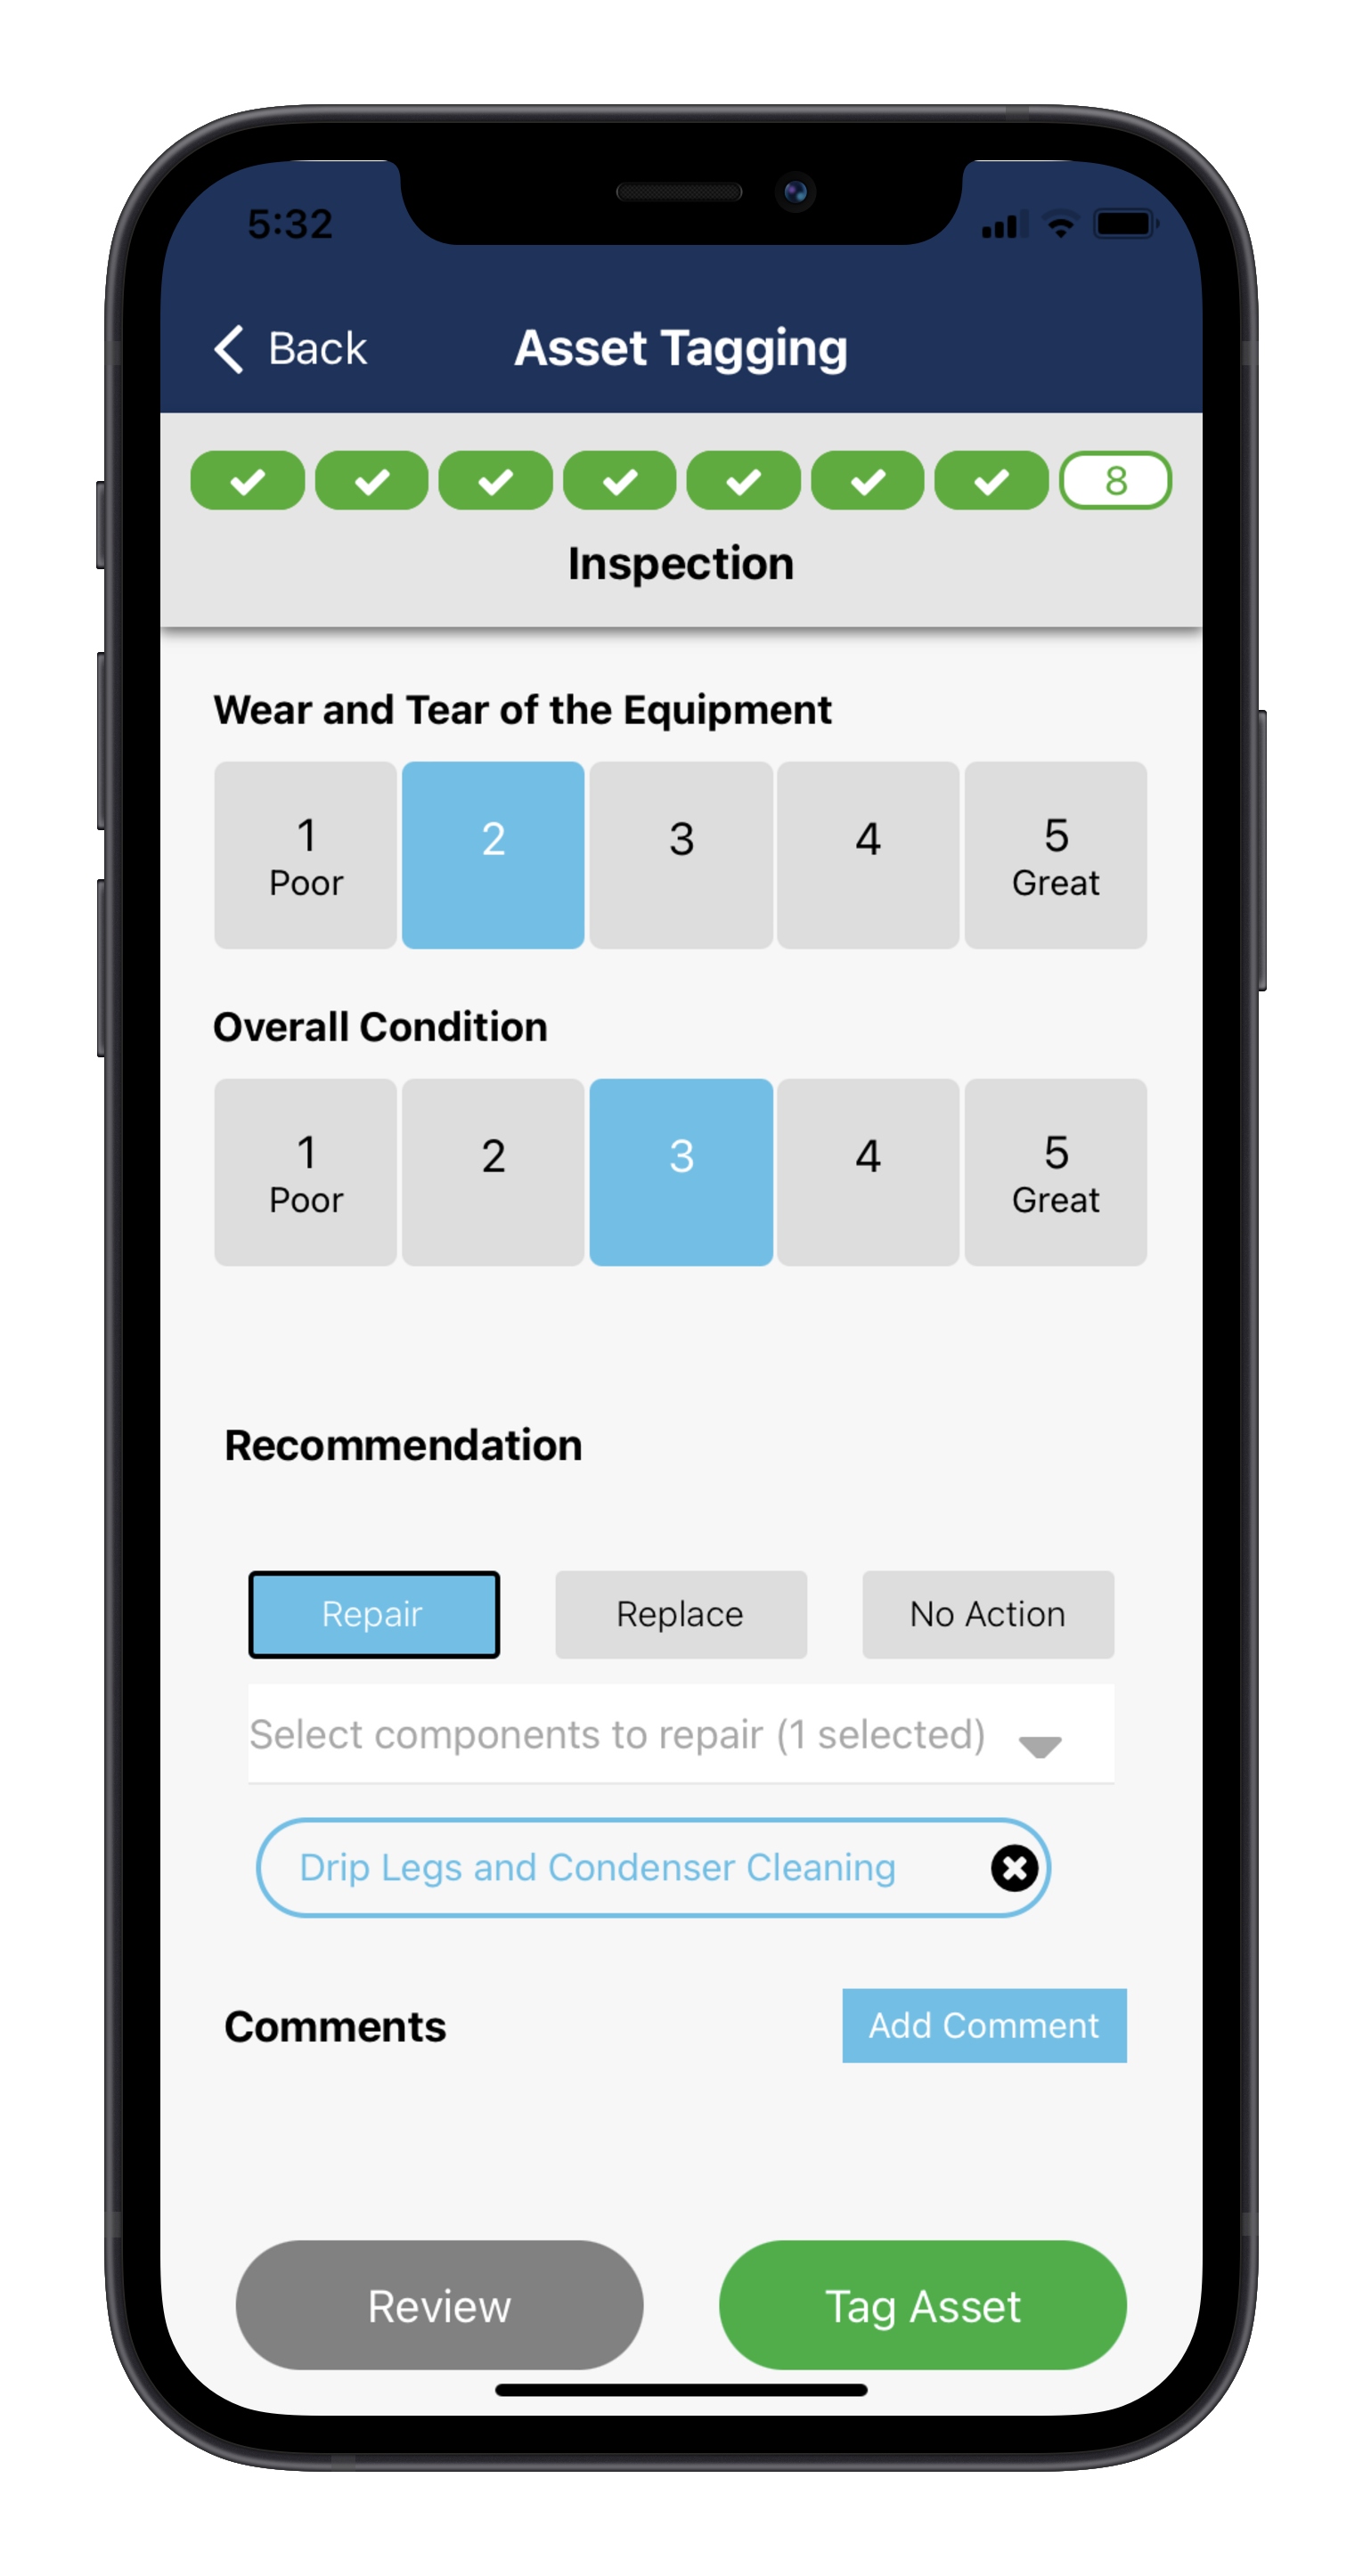
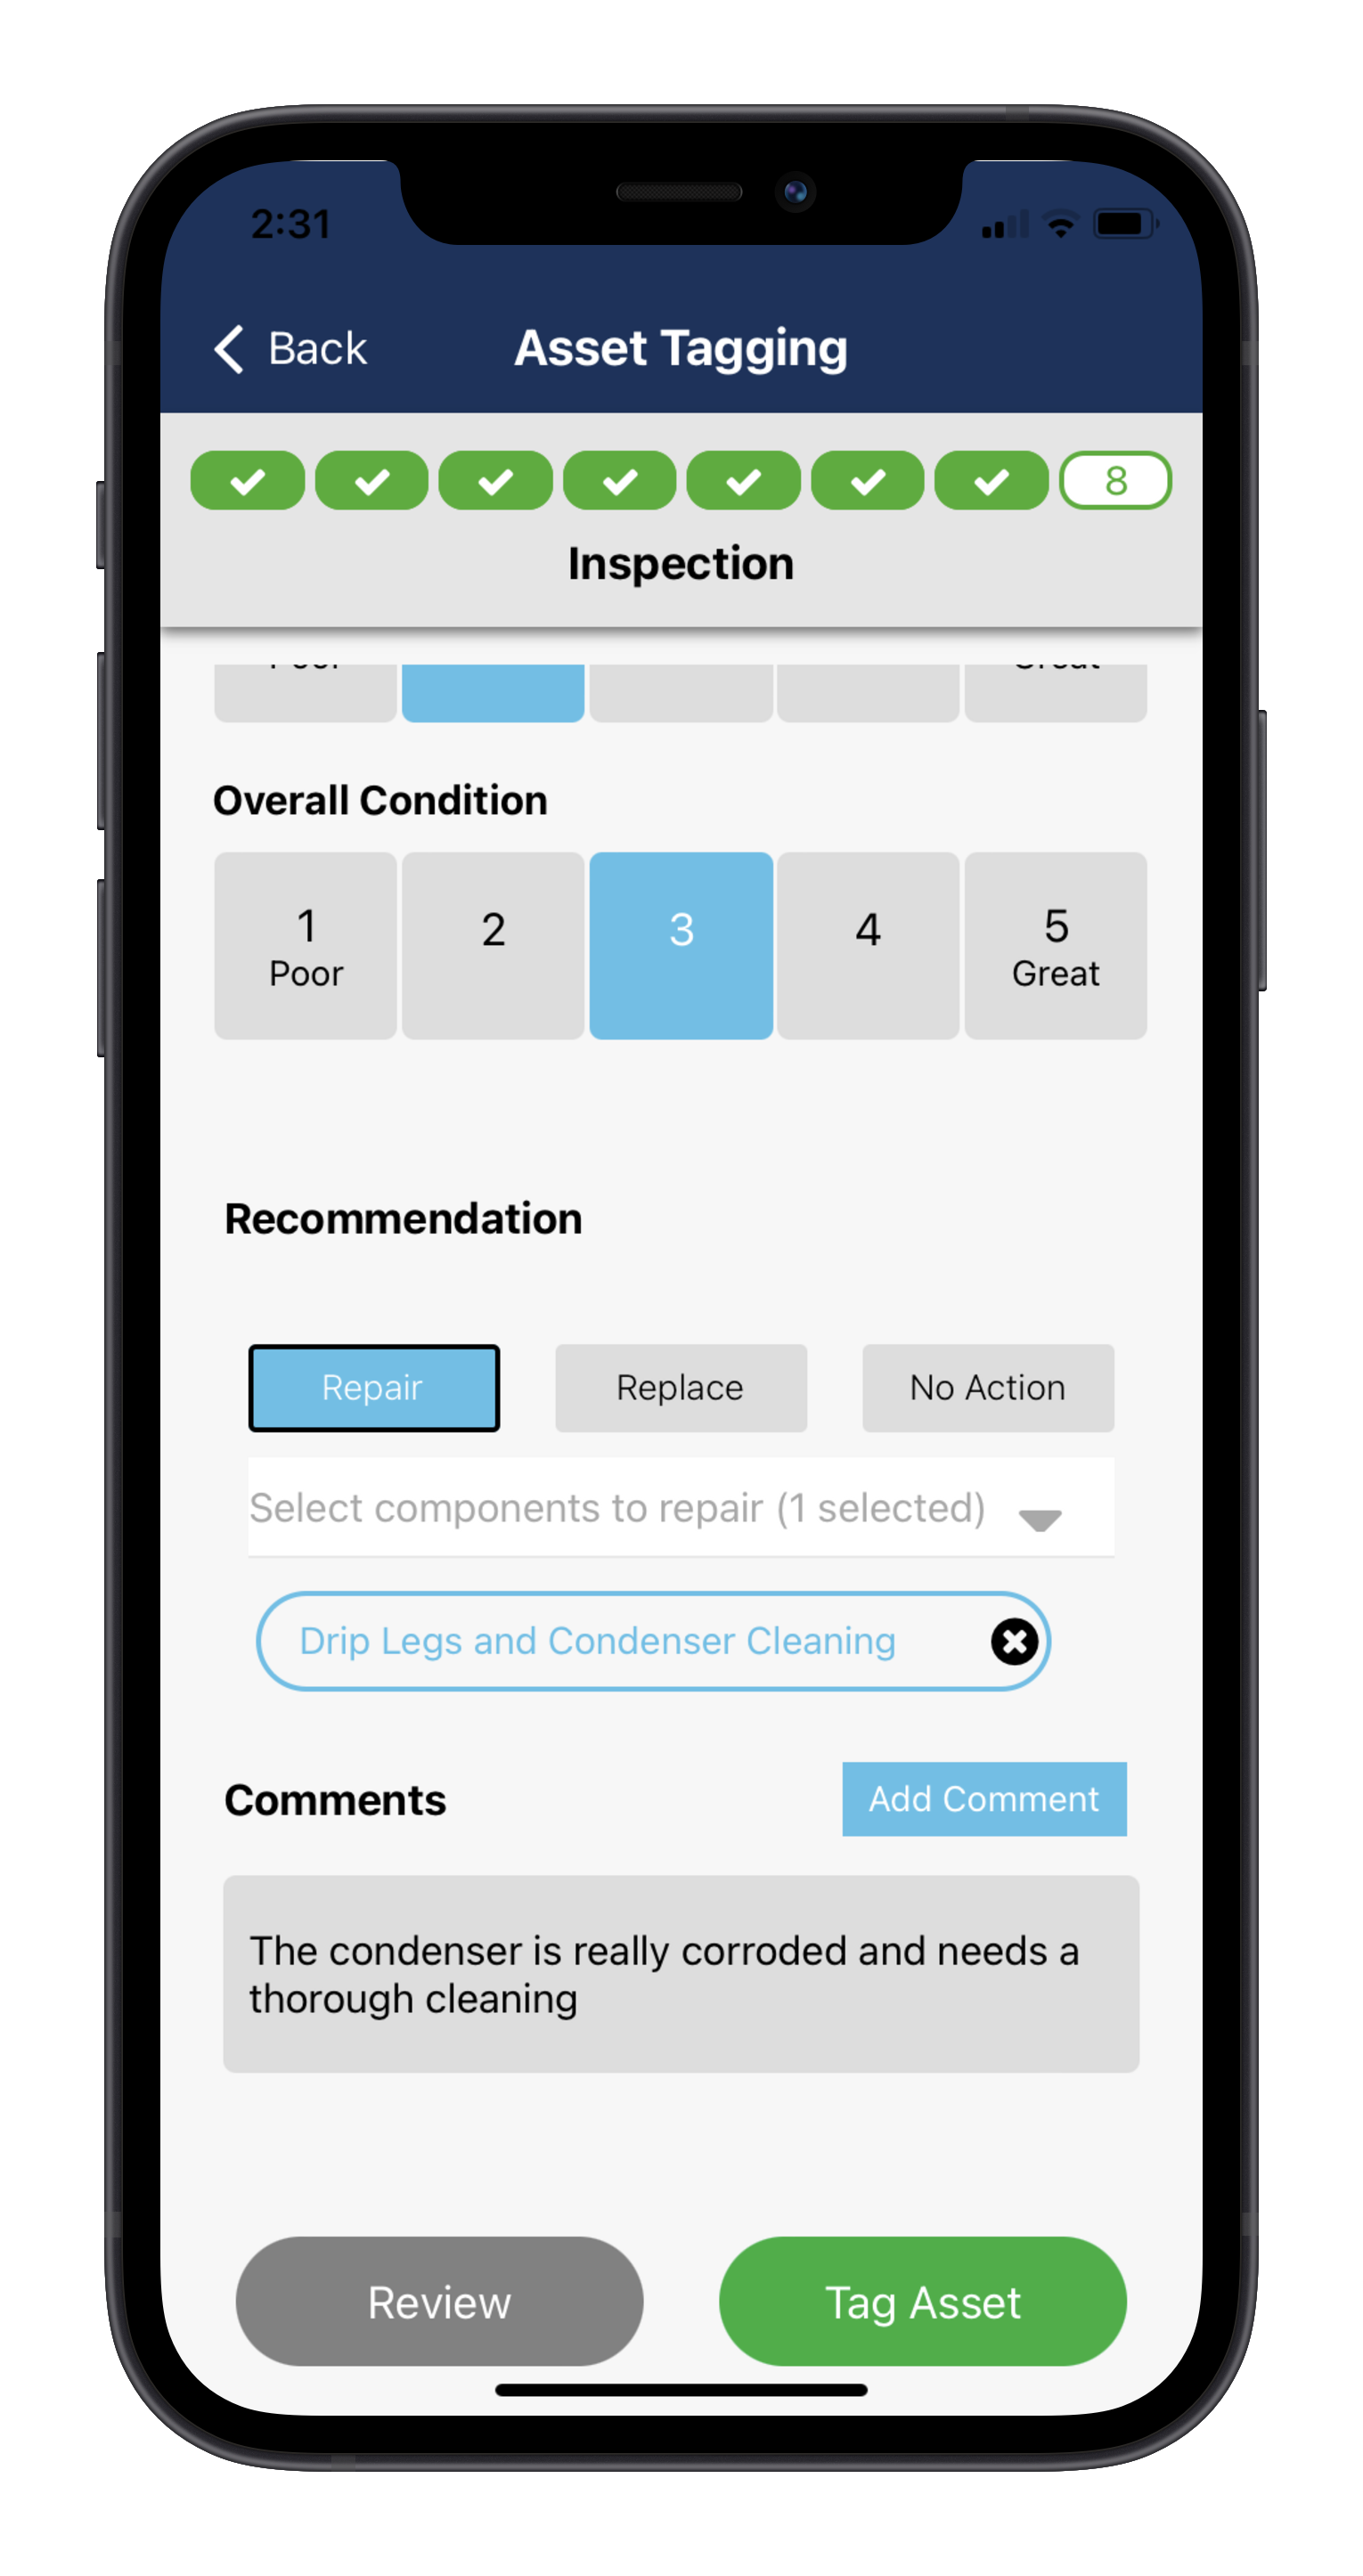
- Tap a number to rate each of the three environmental factors

- Tap a recommendation to indicate the next step.

- Repair - Tap Repair, tap Select Components to Repair, tap the component, and tap Done. If you're replacing more than one component, repeat this step.
- Replace - Tap Replace.
- No Action - Tap this to indicate that a repair or replacement is not required.
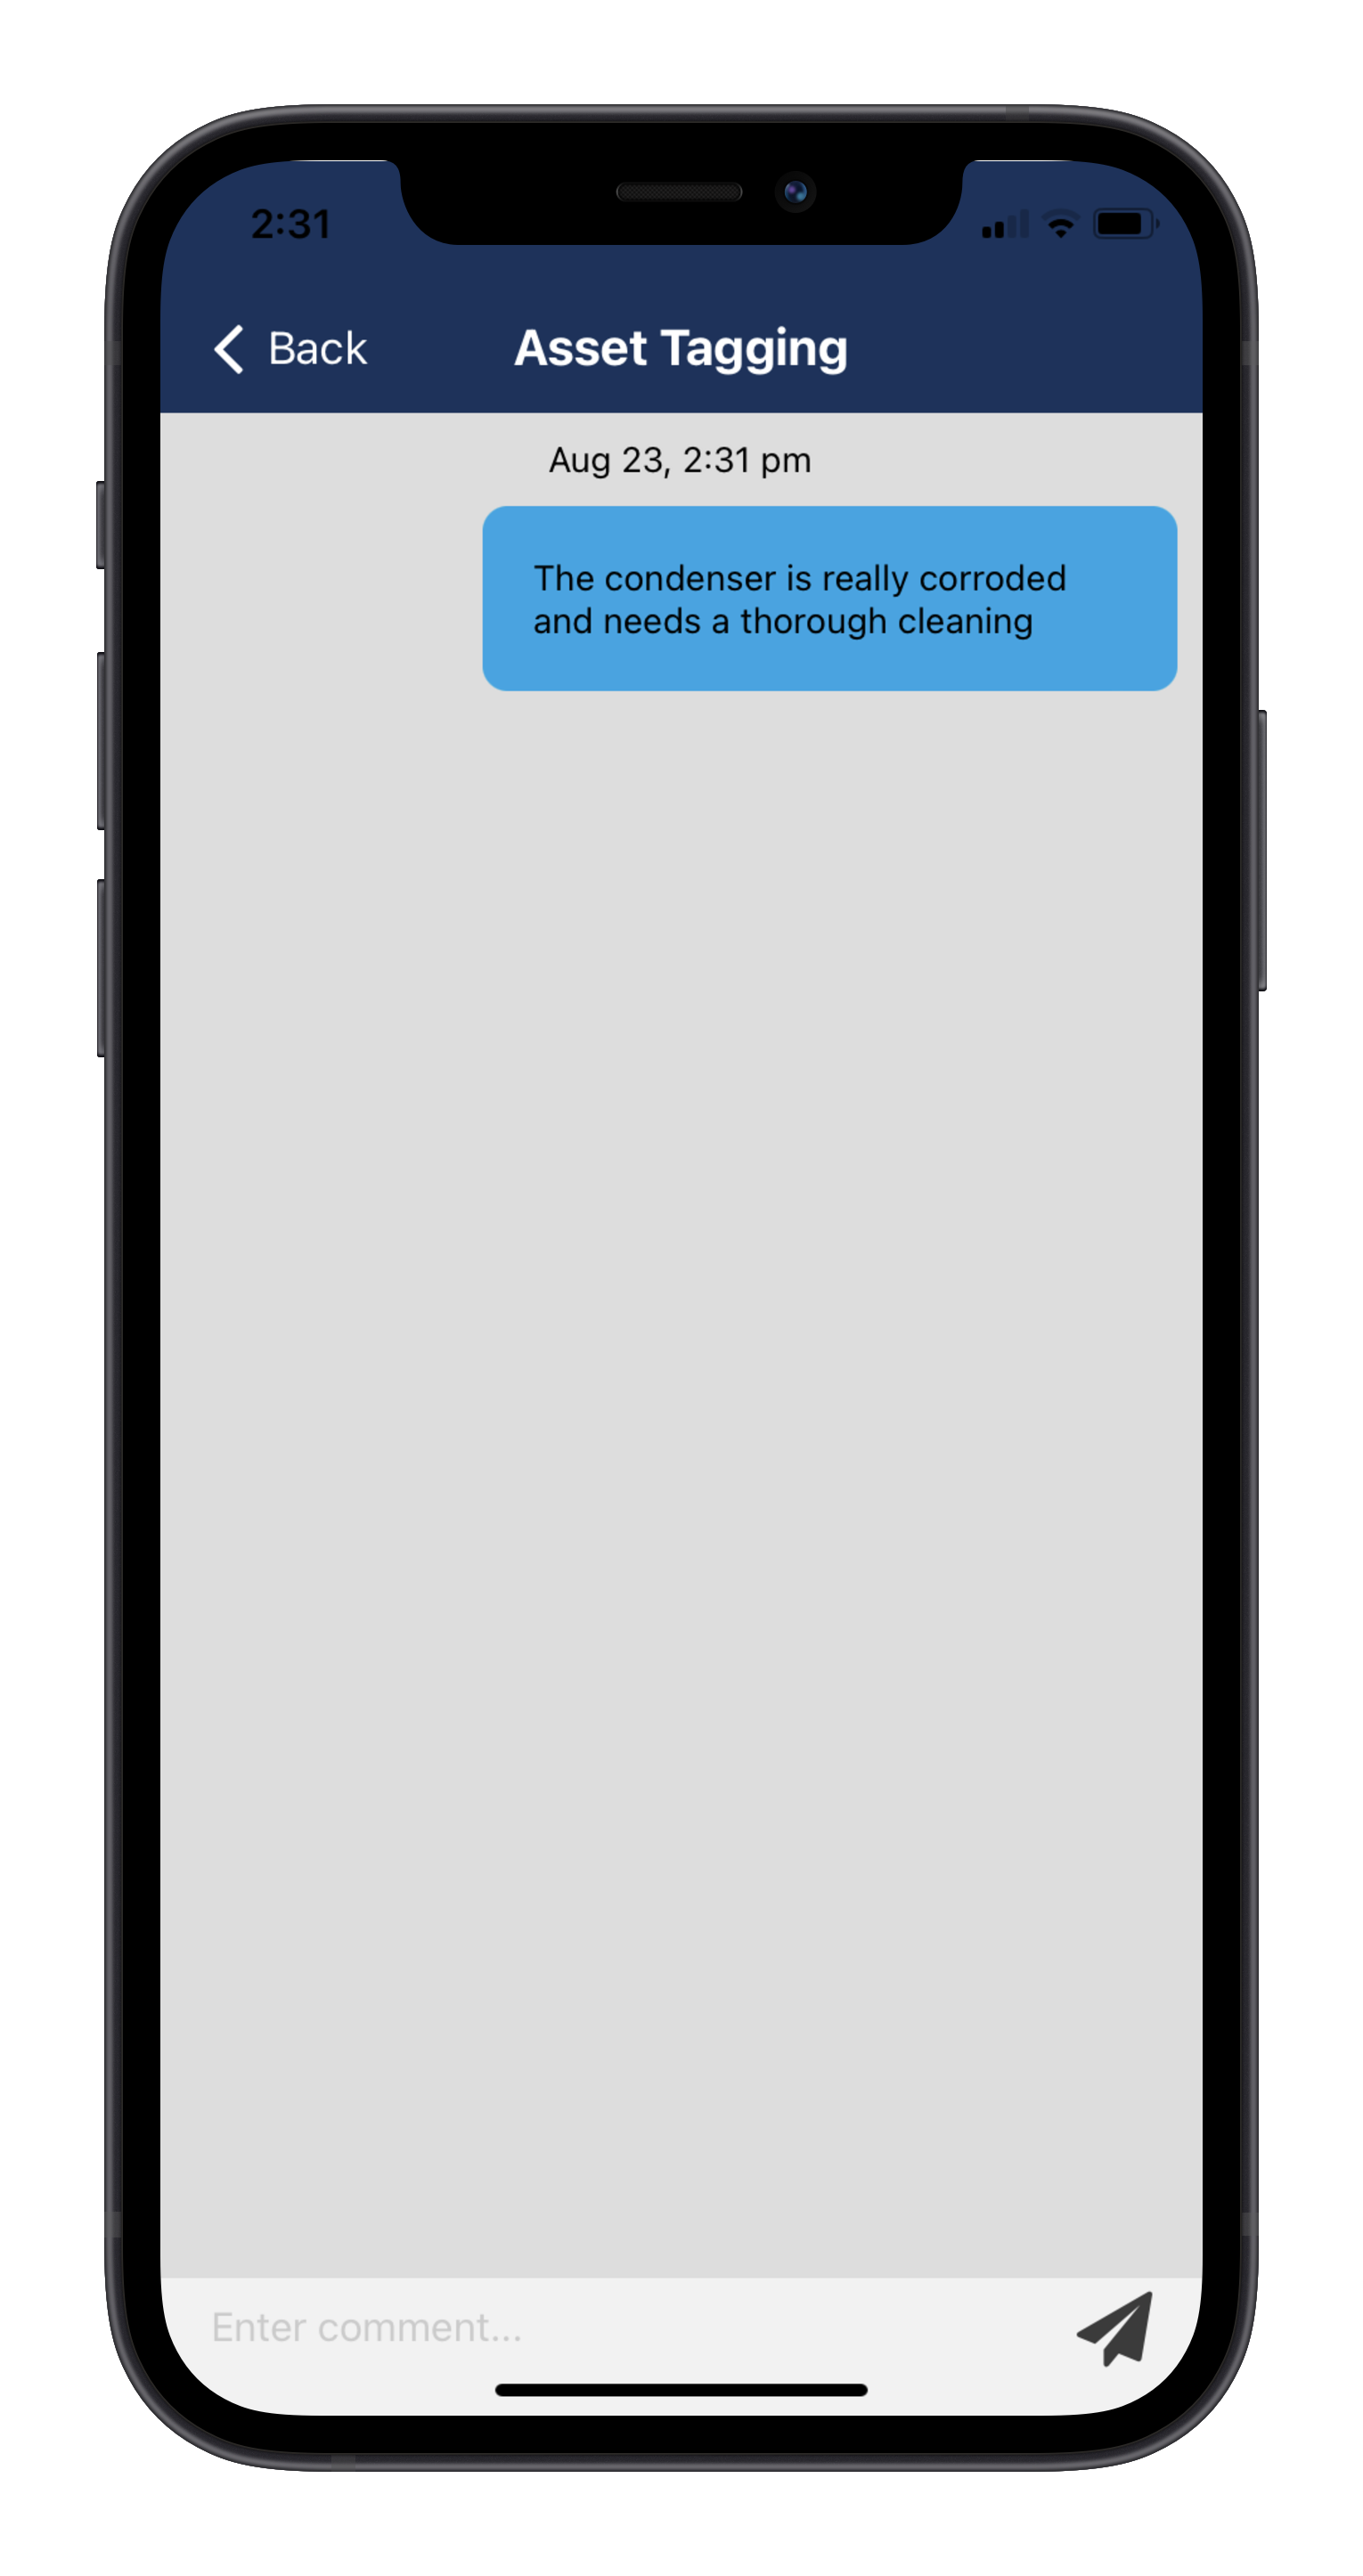
- (Optional) Tap Add Comment, type other details about the repair or replacement, and tap Send to upload the comment to the work order.

If a Motili Admin updates a comment in a work order or quote, you can see those changes here. - Tap Back and tap Tag Asset.

- The asset you tagged appears here. If you need to delete this asset and start over, swipe left and tap Delete. When you finish tagging this asset, tap Back.

- The Assets button now has a green check mark. If a checklist is required, see Complete a Checklist (Mobile). If additional photos are required, see Add Photos (Mobile). Tip: When you return to the main Jobs screen, you can refresh your documents by pulling down from the top of the screen. You are refreshing only the documents that are already downloaded to your device. For example, if a work order changed from In Process to Closed, refreshing makes that update appear.
- Check Out of the work order and then tap Submit Work Order.
- If you are working on a Motili Project where a repair was approved and you performed it while on-site for the Preventative Maintenance, you will see the question Did you perform any repairs on-site? when you submit the work order. If you tap Yes, it will automatically take you to the new Repair Work Order, check you in, and apply the address verification from the original Preventative Work Order to the Repair Work Order. If you didn’t recommend a Repair, tap No to put the job in your queue. You will not have access to the associated Repair Work Order until you submit the Preventative Maintenance Work Order.